Showing posts with label Optional. Show all posts

Wednesday, March 9, 2016

Moon Presence

Moon Presence


Information:
The Moon Presence is an optional boss and Great One located in the Hunter's Dream. Gain 5 Insight for finding it and 5 for killing it. No Lamp activates upon its death.

Special Notes: Can only be fought after consuming three One Third Umbilical Cords, refusing Gehrman's offer of mercy, and killing Gehrman in the subsequent fight.

Lore:
The Moon Presence is a Great One who was beckoned by Laurence and his associates with the Orphan of Kos' Umbilical Cord. Laurence trapped Gehrman there most likely to keep him from interfering with the Healing Church after the Old Yharnam debacle. Gehrman would ultimately become its protector and intermediary for the Hunters passing through. The Moon Presence's ultimate goal is to kill Mergo and Mergo's Wet Nurse, which is why it employs Hunters, to go and do its dirty work for it without risking the attention of other Great Ones. The Moon Presence may also be referred to as Paleblood. When the Hunter doesn't consume the Umbilical Cords, the Moon Presence views you as a new surrogate and protector, and makes you Gehrman's replacement. If the Hunter does consume the One Third Umbilical Cords, you begin to transcend and the Moon Presence sees you as a fellow Great One, and therefore a threat. After beating the Moon Presence, you, the newest Great One, become responsible for the Hunter's Dream.

References and Dialogue:
-"Hunt the Great Ones, Hunt the Great Ones." "The nameless moon presence beckoned by Laurence and his associates. Paleblood." "Three third cords." Notes in Lecture Hall
-"Behold! A Paleblood sky!" Note in Yahar'gul
-"Handwritten scrawl: Seek paleblood to transcend the hunt." Note in Iosefka's Clinic
-"Paleblood, you say? Hmm...Never heard of it." Gilbert
-The Moon Presence is also related to the Blood Moon as it is a part of the Paleblood Sky phase of the game.
-Upon its death the words, "Nightmare Slain" also appear as they did when Mergo dies.

Description:
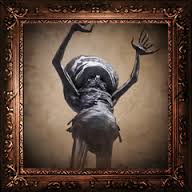
A quadruped skeletal beast with a thin structure and a tentacle crowned head. It also has multiple tentacle tails and an obscene amount of jagged ribs. Its head is oval in shape with three holes in it, two small holes and one large hole, and is diagonally placed on its body. It is black and red in color and has five fingers on each hand.

Location:
Its boss arena is located in the garden of the Hunter's Dream.

Combat:
-Weak to Fire, Bolt and Arcane

The Moon Presence's arena is a wide open garden covered in flowers and large crosses. The ground is mostly even although it does slope downhill. The edge of the arena does offer places to get snagged on but the large size makes it easier to stay in the open.

First Stage:
Despite being the last boss, the Moon Presence has very few attacks and fewer that pose an actual threat. It's movements are very similar to that of beast bosses from the early game. The regular melee attacks it does are all variations of swipe attacks (m): the first where it will walk towards you swiping five times, four quick alternating swipes followed by a slower swipe from right to left; it can do a single swipe from left to right; a slow swipe from its left side, quick swipe from right, repeated once; it can also swipe twice and then leap forward for a grab. It has one that is particular to it where it punches its right arm down and then swirls its tail in a huge circle (m). It can also do a leap attack (h) and try and land on you. The rest of its attacks are all non-physical: the first being an A.O.E., where it rears up on its hind legs and grabs its face which will stop you from using Blood Vials if you are hit by the blood that comes out of the white orb above its head and it also has a variant of this where the white orbs will surround it in a circle and rain blood to the same effect. The last attack it can do will bring the hunter down to one HP no matter what Vitality (can one-shot Co-ops with low health), where it will hold its face in its hands and a red flash will emanate from it.

Second Stage:
The one HP attack will now also block Blood Vial usage.

Drops:
-230,000 Blood Echoes

Tips and Tricks:
-Although intimidating, the Moon Presence can be handled in the same way as the majority of beast bosses. Get behind it and attack before dodging away.
-A +10 weapon with high rally potential is the best option such as the Burial Blade or Hunter's Axe.
-If you damage the head enough, you can get a visceral attack. Backstabs are also very effective.
-Do not panic if it blocks your Blood Vial usage as it is fairly easy to dodge the melee attacks.
-When it uses the one HP attack quickly run up and attack it. It will stand still for a pretty long chunk of time afterwards and with a high rally potential weapon you can regain back all of your health.

Glitches:
-Can fall off the map. 1:20

Damage Indicator:
Slight damage (s)
Moderate Damage (m)
Heavy Damage (h)
Stun (st) 

Thursday, February 4, 2016

Martyr Logarius

Martyr Logarius

Information:
Martyr Logarius is an optional boss located in the Forsaken Castle Cainhurst. Gain one Insight for finding him and three Insight for killing him. Activates the Logarius' Seat Lamp.

Special Notes: You need to kill Martyr Logarius in order to complete Vileblood Hunter Alfred's questline. A cutscene will play if you wear the crown behind Logarius' throne opening the way to Annalise, Queen of the Vilebloods.

Lore:
Martyr Logarius was the leader of the Executioners, a group of hunters from a foreign land, who operated before the Healing Church Hunters. The Executioners were very different from most hunters, mostly because it was hereditary based. Martyr Logarius spent most of his life seeking to kill all the Vilebloods, but failed before killing Annalise, Queen of the Vilebloods. Since he was unable to kill her, Logarius instead used himself as a "blessed anchor" to prevent Annalise from ever leaving Cainhurst either by escape or by rescue.

References and Dialogue:
-"Ah, there's something I want to tell you. A bit of wisdom from the eminent Master Logarius!. Once, a scholar betrayed his fellows at Byrgenwerth...and brought forbidden blood back with him to Cainhurst Castle. It was there that the first of the inhuman Vilebloods was born. The Vilebloods are fiendish creatures who threaten the purity of the Church's blood healing. The ruler of the Vilebloods is still alive today. And so to honor my master's wishes, I search. For the path to Cainhurst Castle....In his time, Master Logarius led his executioners into Cainhurst Castle to cleanse it of the Vilebloods. But all did not go well and Master Logarius became a blessed anchor, guarding us from evil...Tragic, tragic times...that Master Logarius should be abandoned in the accursed domain of the Vilebloods. I must free him, so that he may be properly honored in martyrdom." Alfred before receiving the Unopened Summons.
-"Oh you, is it? Look at this! Thanks to you, I've done it! Well? Isn't it wonderful? Now Master can be canonized as a true martyr! Jealous, huh? Unclean wench! Frailed mostrosity! Bloody fool! Pathetic! As you deserved! Uhh! Blood! You spilled my blood! Pray for Master Logarius in my stead.." If Alfred is spoken to and then killed in Annalise's Chamber..
-"Weapon wielded by martyr Logarius' band of executioners. Used to slaughter the Vilebloods in Cainhurst. Bathed in pools of their blood, and forever steeped in their ire. Transform to release the power of the wheel and manifest their lingering rage in a show of utter brilliance." Logarius Wheel
-"The odd helmet worn by the band of Executioners commanded by martyr Logarius. The conical gold helmet, symbol of the executioners, represent luminosity, ambition, and an unflagging resolve to face impurity, staring it down with a stem golden spirit." Gold Ardeo
-"Attire worn by the band of executioners commanded by the martyr Logarius. Later became the basis for all Church attire, with its heavy draping of Holy Shawl. As the great Logarius once said, "Acts of goodness are not always wise, and acts of evil are not always foolish, but regardless, we shall always strive to be good."" Executioner Set

Description:
Martyr Logarius is a tall bearded undead man who wields a scythe and a short dagger. He wears the Crown of Illusions on his head and is dressed in robes.

Location:
From the Forsaken Castle Cainhurst Lamp, go the opposite direction from the Bloodlickers and take the elevator up. You will enter a room filled with the ghost women. Run past and at the end of the room to the right will be a ladder. Take the ladder up and you will enter a small room. Exit the room and take the stairs to the outside. Once your on the roof drop down to the right to land on the second roof and get on the spire. Drop down from there onto the pathway. Repeat for the next spire and pathway. From there just run up to the archway lit by torches. A short cutscene will play.

Combat:
-Strong against Fire, Bolt and Arcane

Martyr Logarius' arena is a rooftop replete with pillars and lots of elevation changes, there is a throne at the other end of the arena. You can fall off the edge but unfortunately he can't.

First Stage:
Martyr Logarius has several particularly brutal Arcane and melee attacks in this stage. The Arcane attacks are as follows: a A.O.E. in the form of a large skull that materializes in front of him (h), he will swing the scythe right in front of his face and pointing towards you, and he will use this attack fairly quickly when you are right next to him although this can also be long range; he can also summon several smaller skulls in a row that will track you (m) when he swings his scythe from the bottom left to the upper right. He can also bring his scythe up towards the sky and tap it and summon a skull that will track in a circular motion (m). He will mostly resort to magic in this stage, but can also swing with his scythe in very wide arcs (m), these can be in three hit combos from one long swipe to several ending in a smash (m). Be wary because his melee attacks can go through the parapets. He will also occasionally slash very quickly with his dagger.

Second Stage: 
After about forty percent of his health, he will enter a rage mode where he will stab his scythe into the ground and become enveloped in a red haze. When he is finished he will emit an A.O.E. (h) and he will have a new moveset, almost entirely melee attacks and most of them will emit an energy blast on the first or last strike. He can do a flying smash attack (h), where he will fly up into the air with his scythe over his head or a flying swipe attack (h), where he will fly into the air with his scythe pulled back. He can also do a fast thrust with the dagger (m), and if it lands he will typically do a combo of slashes with the dagger (s). He can also do a smash attack with his dagger (m), which will lead into a combo. He can also use his scythe in the typical slow slashes of before only a little harder hitting. There is one Arcane attack he will do in particular, where he will plant a sword in the ground that will summon a rain of swords (m) that will last quite a bit of time unless interrupted. 

Drops:
-25,600 Blood Echoes
-Crown of Illusions (Have to pick up from the light on the walkway)

Tips and Tricks:
-Any weapon +7 or higher will work, preferably a faster one.
-A left hand weapon +5 or higher will work.
-This fight is a lot easier with parrying so be sure to be stocked up on Quicksilver bullets. An Oedon Writhe Rune can be very helpful as it restores bullets with each visceral attack.
-In the first stage, use the parapets to avoid the spells in general, but be wary of melee attacks as he can reach through them with his scythe.
-To avoid the row of skulls dodge around them, or roll quickly in between them.
-To avoid the other two first stage Arcane attacks dodge to the side several times. 
-Try to parry him when he does his scythe swings, they have a pretty wide reach so dodging past usually will get you hit.
-When he is entering his rage mode for the second stage try and get in a few hits, but be wary of the following A.O.E. blast.
-To avoid his flying attacks run towards where he took off. You will have a couple of seconds to hit him when he's landed so take advantage of those moments. If you are locked on this may cause your camera to go haywire.
-Try to parry him during scythe swings rather than his dagger attacks as they are very fast. You can typically dodge several times to the side and get off a few hits after he misses with his smash attack.
-When he plants a sword in the ground try to hit it. It can be locked onto so you can also shoot it, but wait until he is away from it as he will keep attacking you.
-You can keep him from buffing by staying right in front of him and continuously visceral attacking him, although this is very difficult.
-Do not fall off the roof.

Damage Indicator:
Slight damage (s)
Moderate Damage (m)
Heavy Damage (h)
Stun (st)

Wednesday, January 27, 2016

Ebrietas, Daughter of the Cosmos

Ebrietas, Daughter of the Cosmos

Information:
Ebrietas is an optional boss located in the Upper Cathedral Ward and a Great One. Gain three Insight for finding her and three for killing her. Activates the Altar of Despair Lamp upon defeat.

Special Notes: Required to enter the Great Isz Chalice Dungeons.

Lore:
Ebrietas was one of the Great Ones who lay slumbering underground in the Pthumerian labyrinths. When the other Great Ones awoke and left the dungeons on the eve of the fall of the Pthumerians, they left Ebrietas behind to languish in the underground. She was eventually discovered by a group of Byrgenwerth scholars: Laurence, Micolash, and Carryl. Their fascination with her lead to them leaving Byrgenwerth to found the Healing Church to pursue research into the uses of her blood. The Church created a sect within themselves, the Choir, to care for and study her. She would gain a companion, near the end of the Church’s reign, in the form of the Celestial Emissary.

References and Dialogue:
-"Remnant of the eldritch Truth encountered at Byrgenwerth. Use phantasms, the invertebrates known to be the augurs of the Great Ones, to partially summon abandoned Ebrietas. The initial encounter marked the start of an inquiry into the cosmos from within the old labyrinth, and led to the establishment of the Choir." Augur of Ebrietas, used by upper members of the Healing Church such as Iosefka, Micolash, Yurie, and Edgar
-It is possible that the Ebrietas in the Chalice Dungeons exists in the Pthumerians' version of the Nightmare of Mensis and isn't the true Ebrietas but a creation of the Pthumerians' ritual.
-It is possible that the Celestial Larvae in Upper Cathedral Ward are the results of the experiments conducted on the orphans by members of the Choir.
-It is speculated that Ebrietas' "mouth" is not in fact a mouth but her mutilated head; sliced open by either the Choir or by the Pthumerians in an effort to take blood or for research as the skin appears flayed as well as reveals the eyes on the inside of her head.
-Ebrietas is Latin for "drunkenness" possibly a reference to the addictive nature of her blood.

Description:
Ebrietas, like Amygdala, has a Cthulu like appearance. She has a long vertical slit in her face, covered with tendrils around the opening and eyes lining the sides as well as two green, almost human, eyes on the outside of the slit. She has two arms ending in tentacle hands and two "legs" which resemble two snail tails trailing behind her. She also has partial wings surrounded by more tentacles that allow her to fly short distances. She slightly resembles a slug.

Location:
From the Lumenflower Gardens Lamp, break through the large window behind and continue along the balcony. At the back of the room there will be two Celestial Minions; operate the lift and head down the passage where you will enter Ebrietas' arena.

Summons:
-Old Hunter Damian of Mensis is the only summon available. He wields a threaded cane and uses mostly Arcane attacks like the Augur of Ebrietas. His summoning bell is located to the left of the doorway leading into Ebrietas' arena.

Combat:
-Weak to Bolt

Ebrietas' arena is a large pool of water with rock walls on the side. The entrance is a narrow passage and the end has a large statue in the middle. There are lots of nooks along the walls to beware of.

First Stage:
Ebrietas mainly uses melee attacks in the first half of the fight. She can do a head slam (h) that also has a partial flight variant, a very slow tentacle swing (h), and a frenzy inducing grab attack (h), which will one shot most players. She can also do a torso drop attack (h), where she will raise both tentacles above her head and bring her whole torso smashing down. Also, she can fly short distances (s) where take offs and landings can do some damage as well as a charge attack (h); she will rear up before leaning forward to run at you, the tentacles do the most damage in this instance. She may also spit blood that induces frenzy.

Second Stage:
Signalled by Ebrietas casting an "aura" around herself of Arcane particles at around fifty percent health, these will damage you when you are in melee range. She also begins spewing blood and will now use Arcane attacks, such as a Call Beyond (h), which will be signaled by a glowing blue light above her head. They will hit in a volley of three.

Drops:
-28,800 Blood Echoes
-Great Isz Chalice

Tips and Tricks:
-Option One: Use the summon. This makes the fight a little easier as you can switch off her focus between you and Damian. It will keep her from using her blood spewing attack and a Call Beyond as one of you will always be up against her restricting her to melee attacks. Be aware that in higher NGs she will most likely kill him in ten seconds so he's essentially worthless. Also make sure to hold her attention as much as possible otherwise he will die pretty quickly. Just use him as some respite to heal.
-Option Two: Shoot her in the head with a Cannon and drop her down. Visceral attack her, run up and Charge R2 to Visceral Attack again. Repeat. Evelyn upgraded with Bone Marrow Ash is equally viable.
-Option Three (Next Safest): "Orbiting" method. Circle around her just out of range of her melee attacks and after she has completed one of her attacks rush in to attack her chest or, preferably, her head. You can also use a long range weapon, Ludwig's Holy Blade or the Burial Blade, to R2 into her head drop attack (the version with her slamming her tentacles as well).
-Option Four: Stay close to her body and try to stay behind her while getting in hits when you can.
-Option Five: Provoke the head slam by hitting her in the chest and backing off only to return and attack her head. This is dangerous as the head slam can turn into a charge attack.
- Any weapon with Kin or Bolt damage is preferable. Something with a long overhead hit can keep hitting her head and staggering her.


Glitches:
-Ebrietas will be passive if killed in another hunter's world and you touch the Lamp. When you are transported back to your world go in the elevator and use the Bold Hunter's Mark. When spawned you will be in the boss arena and she will be passive. Link

Damage Indicator:
Slight damage (s)
Moderate Damage (m)
Heavy Damage (h)
Stun (st)

Saturday, January 23, 2016

Amygdala

Amygdala:

Information:
Amygdala is the only boss (optional) in the Nightmare Frontier and a Great One. Gain three Insight for finding it and three for killing it. Activates the Amygdala's Chamber Lamp.

Special Notes: Killing this boss is required to enter the Ailing Loran Chalice Dungeons.

Lore:
Amygdala was once one of the Great Ones slumbering beneath Yharnam along with Ebrietas, Daughter of the Cosmos. However, it transcended with the other Great Ones and now resides in its own domain, the Nightmare Frontier. In Yharnam, Amygdala is very obviously an object of great reverence as shown by the multitudes of Amygdala statues around Cathedral Ward and Yahar'gul; probably due to the upper members of the Healing Church being able to see the Lesser Amygdalae around those areas and believing it to be a similar being to their own Ebrietas. Other humans were unable to see them due to the fact that Rom the Vacuous Spider created a wall of sorts to keep them invisible.
Patches the Spider is an especially avid follower.

References and Dialogue:
-It is possible that the Amygdala in the Chalice Dungeons exists in the Pthumerians' version of the Nightmare of Mensis and isn't the true Amygdala but a creation of the Pthumerians' ritual.
-"The gift of the godhead will grant you strength.Oh Amygdala, Oh Amygdala. Have mercy on the poor bastard. What a joy it is, to behold the divine. It must be such a pleasure....You're nigh on a beast on the field, but here you are, treading a measure of the gods....Lord Amygdala. How did this come to pass? Hmph. Now, wait just a moment. Do you think ill of me, me?...Now, say in my heart, you were as a lamb to my god...On the good grace of a certain god, and the way he meted out his love....My god is lost to me, so I must away to find another... Oh, think not of poor Amygdala. Upon that piteous bastard, you bestowed salvation." Patches the Spider
-Amygdala is the Latin word for almond as well as being the fear center of the brain (also almond shaped). 

Description:
While the Lesser Amygdalae have a more Cthulu like appearance with tentacles and a slightly darker color, this Amygdala is lighter and is missing tentacles. It has a large almond shaped head covered with thousands of misshapen eyes and short "hairs". It has eight arms, each with six fingers, and two very heavily armored feet with talon-like claws. It has a short plated tail with fine whiskers protruding from the end.

Location:
From the Nightmare Frontier Lamp head to the left until the first Silverbeast, head down the passage directly in front of it and take the elevator down. It will let out by another Silverbeast, move past it and go down the raised path and enter the archway. If you have stepped in the poison lake you have done something wrong.

Combat:
Weak to Bolt, Fire, and Arcane
Strong against Blunt

Amygdala's arena is a circular courtyard surrounded by high walls. It is relatively flat and grassy with no real obstacles although there are nooks and crannies around the wall though.

First Stage:
Amygdala mostly sticks to melee attacks at this point although it is capable of firing a laser (h) at the hunter. Its eyes will become engorged and it will drag one long line across the ground and an explosion will follow a few seconds after. It will also stomp (m) and do a leaping attack (h), where it leaps up into the air before slamming down on you. It will also curl all its arms around its body and slam them out (m), as well as curl in pairs of its arms at a time (m). It can also do regular swipes (m) as well as slam all its hands down on the ground (h). Can also spew acid (m), by shaking its head wildly.

Second Stage:
After about half its health is gone, Amygdala will gain two new attacks. The first is a modification of the laser where it will instead fire in six short bursts (m) and during the hand slamming attack it will gain wormholes on its palms (Galaxy hands).

Third Stage:
At about a third of its health, it will gain increased reach by ripping off its arms and using them as weapons. Blood will now shoot in geysers from its back. It keeps all of its previous move set.

Drops:
-21,000 Blood Echoes
-Ailing Loran Chalice

Tips and Tricks:
-Ludwig's Holy Blade, Church Pick, or the Burial Blade +7 or higher in its transformed state is the best weapon when equipped with Bolt or Fire damage (paper or gem). Any weapon with a bit of reach is good as it can hit several of its arms at once.
-A Flamesprayer or Cannon +5 or higher can be used to deal damage to its head, enough will make it stagger, so that you can visceral attack it. Rush in after an attack, spray its head for a few seconds and retreat or shoot its head with Cannon and wait for it to drop to the ground. Using the Executioner's Gloves or Simon's Bowblade (DLC) is also possible.
-A Call Beyond does a hefty amount of damage.
- You can either stay in front of Amygdala and wait for it to do either version of the Galaxy hands attack. It will drop its head down and use that time to get in a few hits. If your stamina is depleted use the Flamesprayer.
-You can also stay to the side of Amygdala and wait for the attack animations to stop before hitting its arms or rushing underneath it to do overhead damage.
-If a long battle is alright, you can stay to the sides of its feet (be mindful of the curled arm attack as it hits behind) and swipe at its ankles and crotch (will deal about ten damage to the ankles). If you hit its legs enough it will collapse.
-Attacking its arms, hands and head to deal the most damage. Its ankles and tail are the most heavily armored although the crotch is vulnerable.
-To avoid the continuous laser attack continue to dodge to the side. Avoid the shorter laser attack by dodging erratically in all directions or just slowly walk to the sides.
-Molotov Cocktails can help speed the fight along. Make sure to lock onto the head or else they will be thrown towards the crotch.

Glitches:
-In the Chalice Dungeons, Amygdala can become stuck behind the ceiling while performing the leap attack. Link

Damage Indicator:
Slight damage (s)
Moderate Damage (m)
Heavy Damage (h)
Stun (st)

Friday, January 22, 2016

Celestial Emissary

Celestial Emissary:
Information:
The Celestial Emissary is a Great One and Optional Boss in the Upper Cathedral Ward. Gain 2 Insight for killing the boss. Activates the Lumenflower Gardens Lamp upon defeat.

Lore:
The Celestial Emissary is the successful experiment of the Choir to create a go between for the Great Ones and themselves. It was most likely successful because of the refined blood created by Iosefka; the minions in her clinic and in the Lumenflower Gardens were the less successful results of her experimentation.

References and Dialogue:
-It is possible that the Lumenflowers also precipitated the successful transformation while the Lumenwood could not.
-His minions can also be found in the Forbidden Woods.

Description:
Initially a small blue humanoid figure with a bulbous, gelatinous head with light blue, glowing particles floating inside. Although its limbs appear shriveled, it does have a a rather round torso. Later it grows to almost three times its size and will sprout glowing tentacles from where the blue particles were on its head.

Location:
From the Upper Cathedral Ward lamp go up the stairs through the gate (if opened) go up the stairs and down the passage. There will be a Celestial Minion in the passageway. Pass that and you will enter the boss arena.

Combat:
-Weak to Bolt

The Celestial Emissary's arena has three levels: a bottom level with lumenflowers, a second level that is pretty much a landing, and a third level on both sides that has rows of pillars on the side. There are also a bunch of respawning Celestial Minions. They will continue to run towards the hunter and flail their arms around (s) along with a slower swiping attack (s).

First stage:
The Celestial Emissary is disguised as one of the minions and mimics their attack patterns. However it tries to stay towards the back of the pack.

Second Stage:
At around half its health the Celestial Emissary will triple in size and its attacks will do significantly more damage. It keeps the flailing arms attack as well as gaining a body drop attack (h), where it will slam its torso into the ground. It will stomp in quick succession (m), lifting its leg alternately pounding its feet in the ground, and can do a two handed swipe attack (m), raising both its arms diagonally.

Third Stage:
With a third of its health left, the Emissary will sprout tentacles from its head and begin to use a laser attack (h). It will appear as a blue light around his head and shoot a sequence of six lasers in the hunter's direction.


Drops:
-24,640 Blood Echoes
-Communion Caryll Rune

Tips and Tricks:
-A Tonitrus +4 or higher is quite effective although a weapon with Bolt Paper or a Bolt enchantment will fair just as well. 
-A weapon with a long horizontal swipe, like the Hunter's Ax or Ludwig's Holy Blade, can be useful in mowing down the minions.
-Dealing with the minions is fairly easy. Just swipe a few times and that should give you free reign to wail on the Emissary. 
-If you need to heal go to the third level and duck behind the pillars. The boss will not follow you there although the minions will and this should buy the hunter some time.
-Staying close to the boss during the third stage will help keep him from doing the laser attack.

Glitches:
-The Emissary can become trapped if he transforms too close to the back wall. Link
-The Emissary can disappear after transforming. Link


Damage Indicator:
Slight damage (s)
Moderate Damage (m)
Heavy Damage (h)
Stun (st)
Tuesday, January 5, 2016

Cleric Beast

Cleric Beast:

Information:
The Cleric Beast is an optional Boss located in Central Yharnam, most likely the first one you will meet. Gain one Insight for finding him and three for defeating him. Activates the Great Bridge Lamp upon his death.

Special Notes: Although optional, fighting the Cleric Beast is the only way to obtain the Kirk Hammer.

Lore:
The Cleric Beast was once a member of the Healing Church, who fell to the beastly scourge caused by the old blood.

References and Dialogue:
-"As it was, clerics transformed into the most hideous of beasts." Sword Hunter Badge

Description:
The Cleric Beast is a deformed wolf-like being with antlers and one bigger deformed arm. It is giant, making it slow, and it also walks on its hind legs using its larger arm to drag the rest of its body forwards. Upon arrival, he leaps over the gate at the end of the Great Bridge.

Location:
From the Central Yharnam Lamp, take the stairs to the right. Continue down the road to the right, past the bonfire and the Huntsmen and continue up the stairs. You will see a Brick Troll on your right and some Crows on your left. Head up the stairs to be greeted by more Huntsmen and at the very top of the stairwell some Netherbeasts. Past the Netherbeasts you will see another Brick Troll surrounded by Crows and you will pass under an arch to reach the Cleric Beast.

Summons:
-You can summon Father Gascoigne, if you have not killed him in the next boss battle. He wields a Hunter's Ax and a Hunter's Blunderbuss. His first summoning bell is located past the gate to the left at the Central Yharnam Lamp next to the ax and torch wielding Huntsmen. His second bell is located by the fountain where you encounter the first Brick Troll.
-You can also summon Alfred after encountering him in the Cathedral Ward. He uses a Kirkhammer and Hunter's Blunderbuss. If you have spoken to him he will be at the bell past the gate to the left instead of Father Gascoigne.

Combat:
-Weakness to Fire and Serration
-Strong against Blunt, Arcane, and Bolt

The Cleric Beast's arena is a very long, narrow bridge with several statues in the corners. At the ends, there are two slightly wider sections but it is not by much and they mostly present opportunities to be cornered. The dead ends tend to be a little niche to get caught in so avoid those.

Stage One:
This is not truly a stage but rather a mode that the Cleric Beast cycles through during the fight. In this stage, he is quite slow with very long windups between his swiping attacks (slight damage for left arm, moderate damage for the larger one), he will lift his arm up and swing it across his body; his leap attack (m), he will crouch down before leaping into the air; and his grab attack (h), he will seem to be making a windup for a clap but will grab you instead and pound you into the ground.

Stage Two:
He will howl and glow red after taking a fair bit of damage to his limbs. This is indicative of him healing his limbs and he will enter a rage mode where he is slightly faster and more aggressive. His combos are slightly longer as well.

Drops:
-4,000 Blood Echoes
-Sword Hunter Badge

Tips and Tricks:
-The best weapon for the fight will undoubtedly be the Saw Cleaver or the Saw Spear because of the extra Serration Damage.
-The next best weapon would be the Hunter's Ax as a charged R2 attack will bring the Cleric Beast down for a couple of seconds.
-Stay to the side or behind him. If you have to move towards him, roll towards his smaller arm as that does significantly less damage.
-Hit him with an Oil Urn and then a few Molotovs to help progress the fight along.
-You can visceral attack him if you shoot him enough times although it isn't suggested as he can be taken down pretty quickly with normal attacks.
-He is very slow so don't waste stamina dodging away from him if you can walk backwards to heal up.
-A summon can make the fight more difficult due to the small amount of space in which to fight the Cleric Beast resulting in a lot of collateral damage.

Glitches:
-After the grab attack the Cleric Beast will become passive if you were not killed. 9:35
-After the grab attack the Cleric Beast can throw you off the map. Link

Damage Indicator:
Slight damage (s)
Moderate Damage (m)
Heavy Damage (h)
Stun (st)


Monday, January 4, 2016

Darkbeast Paarl

Darkbeast Paarl:


Information:
Darkbeast Paarl is an optional boss located in between Old Yharnam and the Hypogean Gaol. Gain one Insight for finding him and three for killing him. After she is killed the Graveyard of the Darkbeast Lamp is activated.

Special Notes: If you haven't attacked any of the beasts directly in front of Djura's tower, Djura will be friendly after going into Paarl's Arena and going up his tower from the back route. 

Lore:
Darkbeast Paarl is one of a group of beasts originating in Loran. She was transformed much earlier than the beasts in Yharnam; most likely an unfortunate Pthumerian. Her kind was closely studied by Archibald, the creator of the Tonitrus and a member of the Healing Church. She most likely is above ground to be studied by Archibald to avoid the dangerous trek into the dungeons.

References and Dialogue:
-"A unique trick weapon contrived by Archibald, the infamous eccentric of the Healing Church workshop. Striking this peculiar iron morning star flail like a match generates the same blue sparks that blanket a darkbeast." Tonitrus
-Another is found in the Chalice Dungeons as a boss, Loran Darkbeast.
-Paarl is Dutch for Pearl, suggesting a term of endearment or a female.

Description:
Paarl is a skeletal beast covered in black fur that becomes infused with electricity. She is quite large and moves very quickly around the graveyard. When she strikes the ground electricity shoots from the tips of her claws.

Location:
From the Hypogean Gaol Lamp, go down the stairs two levels until you see a small doorway. enter through the doorway and continue to the last cell of the prison. There will be a hole in the wall, enter through there and down some stairs will be a pile of dark fur and bones which will become electrified as you approach it.

Combat: 
-Weak to Fire and Arcane
-Strong against Blunt and Bolt

Paarl's arena is a walled grassy knoll with no real areas to take cover. There are a few niches to avoid along the walls but other than that there are no real places to get stuck in.

First Stage:
Paarl will swipe with her claws usually in groups of two and three (m), quick windup with right or left arm; perform a leap attack (h), crouches before leaping towards you; will slam her fist down causing sparks to fly (h), makes a fist in the air as a windup; and lastly will do an A.O.E. blast (h), she will rock back on her back legs and scream.

Second Stage:
About a minute into the fight she will perform what looks like the A.O.E. but is actually her charging up. She will now shoot electric trails from his claws and is much more aggressive.

Drops:
-23,100 Blood Echoes
-Spark Hunter Badge

Tips and Tricks:
- Do not use a Kirk Hammer in its transformed state
- Ludwig's Holy Blade or a Saw Cleaver +4 or more with Fire Paper or a Fire Blood Gem, are the best because of the faster windup times.
-A transformed Hunter's Axe +4 with the additional items, can be very helpful if you are able to perform a charged R2 attack as it will knock Paarl over and she will lose his aura
-Do not lock on to Paarl, try to stay under her, and aim for her back legs. Enough hits will drop her to the ground without her electric aura and she will have to run away to charge herself back up.
-Roll through her swipes to get underneath her and even if you take damage it will give you a couple of seconds to heal up or attack to gain back the health
-Keep Paarl away from the wall so you do not get trapped
-Flamesprayer +4 is incredibly useful as when Paarl is knocked down you can continue to do damage while waiting for your stamina bar to become full. The constant damage will keep her from getting up.
-Bring Molotov Cocktails and an Oil Urn if you want to shave off a good portion of her health during the fight.
-Henryk's Hunter Set is a good edition to the fight because of its high Bolt resistance

Glitches:
-You can trap Darkbeast Paarl in one of the niches along the wall. Link
-You can render Darkbeast Paarl passive by exiting the game in her arena and re-entering. Link

Damage Indicator:
Slight damage (s)
Moderate Damage (m)
Heavy Damage (h)
Stun (st)

Blood Starved Beast

Blood Starved Beast


Information:
The Blood Starved Beast is an optional boss located in Old Yharnam. There is another one, already dead, located inside the large chapel which is crucified before a crowd of Beast Patients and Cloaked Beasts. Gain one Insight for finding it and three after its death. Once killed it activates the Church of the Good Chalice Lamp.

Special Notes: Killing the Blood Starved Beast unlocks the door to the Healing Church Workshop. Down the stairs from the Cathedral Ward Lamp and to the right will be a door that will now be unlocked.

Lore:
The Blood Starved Beast is one of the many who fell to the beastly scourge that destroyed Old Yharnam. Before its transformation, the Beast's addiction made it the object of purifying rituals, such as self flagellation, most likely initiated by the Healing Church.

References and Dialogue:
-Can be found be found crucified in front of the altar in Old Yharnam.
-Can be found in the Chalice Dungeons
.
Description:
The Blood Starved Beast looks like a crouched over animal with the skin on its back flayed open to expose its bones. It has long claws and is mostly known for its erratic movements. It has almost no hair and when it rears up it exposes a prominent set of ribs indicative of its starvation. When cut it bleeds clear fluid and while running the skin on its back flaps around.

Location:
From the Old Yharnam lamp, make your way outside and across the bridge: from there continue down the stairs at your right. There will be another set of stairs to the right go down those and you will go around a corner to see a ladder. Go down the ladder and run straight until you see the tiny building on the right. Go down that ladder and take a right. Enter the small doorway and continue through the room. You will exit into a courtyard with some Scourge Beasts (werewolves), kill them, turn left and continue down that road. You will go down a set of stairs and will go down a steep slope into a church.

Summons:
There is one summon available for this fight if you spoke to him in the Cathedral Ward: Alfred Vileblood Hunter, who wields a Kirkhammer and a Hunter Blunderbuss. His summoning bell is located behind the wall to the right of the stairs leading down to the church.

Combat:
-Serious Weakness to Fire
-Strong against Arcane and Bolt

The Blood Starved Beast is located in an abandoned church. The church is very long with a row of pillars on either side of the arena and a large altar positioned at the back of the church. Behind the altar is a body with three antidotes.

First stage:
The Beast attacks with a set of forward slashes (m), raises its left arm and rears back a bit, a single claw swipe sometimes followed by a charge attack (s), raises right arm slowly, and will jump towards the player before slashing (m), raises right arm and lunges towards player, in the first stage. It approaches quite slowly in this stage and the windup for its attacks are pretty slow at this point although the actual slash is executed quite quickly,

Second stage:
The Beast enters the second stage when it rears up on its back legs and howls while clear fluid shoots from its body. It is now faster and more erratic and its attacks have a poison effect to them. Its combos are much longer at this point and it is more likely to use its grab attack (h), moves both arms out to the side at hunter level (like it is about to clap), and its A.O.E. attack (h), it moves back and forth with its head down before standing up releasing a poison cloud.

Third stage:
Also shown by the Beast rearing up on its hind legs and howling. It now has a poison "aura" of sorts and even being too close to it will result in a poison effect taking hold. It again gains more speed and it more likely to use the poison cloud attack.

Drops:
-6,600 Blood Echoes
-Pthumeru Chalice

Tips and Tricks:
-Using Alfred is very helpful in this fight because he becomes a great decoy for the Beast. Be careful to watch his health and distract it when he needs to heal.
-Hiding behind pillars will give you time to heal up or use an antidote. Stay close to them if you can and duck behind when you are low on health.
-Always dodge to the left, never backwards.
-The best weapon for this fight would be any weapon with serration damage, such as a Saw Cleaver or a Saw Spear +3 or higher equipped with Fire Paper.
-The Beast can be staggered at all stages of the fight with Blunderbuss or a charged R2 attack from behind.
-A Hunter Blunderbuss is the best secondary weapon if you are trying to visceral attack it, in which case wait until it raises its right arm for the claw swipe or the grab attack when you are out of range. These are the easiest attacks to parry but the others are possible.
- A Flamesprayer +3 or higher can be used as well in conjunction with Alfred or just as a means to preserve stamina in order to dodge away once it turns around. Keep a continuous spray towards its back or sides to avoid getting hit.
-Walk forward and to the left and his attacks will miss.
-Bring lots of antidotes and make use of the ones on the body behind the altar if you run out
-Wearing the Black Church Garb is helpful due to its high Slow Poison Resistance
-Molotov Cocktails are great to use at the end of the fight although be prepared to miss.
-Pungent Blood Cocktails can distract the Beast although it still attacks the item erratically. Use this time to heal up or pop a few antidotes. If not, attack while it is distracted.

Glitches:
-Can lunge through brick wall behind altar and get stuck there. Watch 3:50
-Can be visceral attacked through the wall. Link

Damage Indicator:
Slight damage (s)
Moderate Damage (m)
Heavy Damage (h)
Stun (st)