Showing posts with label Great One. Show all posts

Wednesday, March 9, 2016

Moon Presence

Moon Presence


Information:
The Moon Presence is an optional boss and Great One located in the Hunter's Dream. Gain 5 Insight for finding it and 5 for killing it. No Lamp activates upon its death.

Special Notes: Can only be fought after consuming three One Third Umbilical Cords, refusing Gehrman's offer of mercy, and killing Gehrman in the subsequent fight.

Lore:
The Moon Presence is a Great One who was beckoned by Laurence and his associates with the Orphan of Kos' Umbilical Cord. Laurence trapped Gehrman there most likely to keep him from interfering with the Healing Church after the Old Yharnam debacle. Gehrman would ultimately become its protector and intermediary for the Hunters passing through. The Moon Presence's ultimate goal is to kill Mergo and Mergo's Wet Nurse, which is why it employs Hunters, to go and do its dirty work for it without risking the attention of other Great Ones. The Moon Presence may also be referred to as Paleblood. When the Hunter doesn't consume the Umbilical Cords, the Moon Presence views you as a new surrogate and protector, and makes you Gehrman's replacement. If the Hunter does consume the One Third Umbilical Cords, you begin to transcend and the Moon Presence sees you as a fellow Great One, and therefore a threat. After beating the Moon Presence, you, the newest Great One, become responsible for the Hunter's Dream.

References and Dialogue:
-"Hunt the Great Ones, Hunt the Great Ones." "The nameless moon presence beckoned by Laurence and his associates. Paleblood." "Three third cords." Notes in Lecture Hall
-"Behold! A Paleblood sky!" Note in Yahar'gul
-"Handwritten scrawl: Seek paleblood to transcend the hunt." Note in Iosefka's Clinic
-"Paleblood, you say? Hmm...Never heard of it." Gilbert
-The Moon Presence is also related to the Blood Moon as it is a part of the Paleblood Sky phase of the game.
-Upon its death the words, "Nightmare Slain" also appear as they did when Mergo dies.

Description:
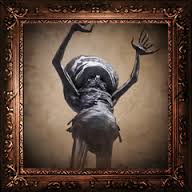
A quadruped skeletal beast with a thin structure and a tentacle crowned head. It also has multiple tentacle tails and an obscene amount of jagged ribs. Its head is oval in shape with three holes in it, two small holes and one large hole, and is diagonally placed on its body. It is black and red in color and has five fingers on each hand.

Location:
Its boss arena is located in the garden of the Hunter's Dream.

Combat:
-Weak to Fire, Bolt and Arcane

The Moon Presence's arena is a wide open garden covered in flowers and large crosses. The ground is mostly even although it does slope downhill. The edge of the arena does offer places to get snagged on but the large size makes it easier to stay in the open.

First Stage:
Despite being the last boss, the Moon Presence has very few attacks and fewer that pose an actual threat. It's movements are very similar to that of beast bosses from the early game. The regular melee attacks it does are all variations of swipe attacks (m): the first where it will walk towards you swiping five times, four quick alternating swipes followed by a slower swipe from right to left; it can do a single swipe from left to right; a slow swipe from its left side, quick swipe from right, repeated once; it can also swipe twice and then leap forward for a grab. It has one that is particular to it where it punches its right arm down and then swirls its tail in a huge circle (m). It can also do a leap attack (h) and try and land on you. The rest of its attacks are all non-physical: the first being an A.O.E., where it rears up on its hind legs and grabs its face which will stop you from using Blood Vials if you are hit by the blood that comes out of the white orb above its head and it also has a variant of this where the white orbs will surround it in a circle and rain blood to the same effect. The last attack it can do will bring the hunter down to one HP no matter what Vitality (can one-shot Co-ops with low health), where it will hold its face in its hands and a red flash will emanate from it.

Second Stage:
The one HP attack will now also block Blood Vial usage.

Drops:
-230,000 Blood Echoes

Tips and Tricks:
-Although intimidating, the Moon Presence can be handled in the same way as the majority of beast bosses. Get behind it and attack before dodging away.
-A +10 weapon with high rally potential is the best option such as the Burial Blade or Hunter's Axe.
-If you damage the head enough, you can get a visceral attack. Backstabs are also very effective.
-Do not panic if it blocks your Blood Vial usage as it is fairly easy to dodge the melee attacks.
-When it uses the one HP attack quickly run up and attack it. It will stand still for a pretty long chunk of time afterwards and with a high rally potential weapon you can regain back all of your health.

Glitches:
-Can fall off the map. 1:20

Damage Indicator:
Slight damage (s)
Moderate Damage (m)
Heavy Damage (h)
Stun (st) 

Thursday, February 18, 2016

Mergo's Wet Nurse

Mergo's Wet Nurse


Information:
Mergo's Wet Nurse is the last mandatory boss and a Great One in the game. Gain 3 Insight for finding her and 3 for killing her. Activates Wet Nurse's Lunarium Lamp.

Lore:
Mergo's Wet Nurse is the Great One responsible for taking care of Formless Oedon's and Queen Yharnam's baby, Mergo. Although the Wet Nurse does reside in the Nightmare of Mensis, it is only to act as a protector for Mergo and the Wet Nurse's death triggers the death of Mergo. The Wet Nurse and her charge are the final prey of the hunters that pass through the Hunter's Dream. 

References and Dialogue:
-"Every Great One loses its child, and then yearns for a surrogate. This Cord granted Mensis audience with Mergo but resulted in the stillbirth of their brains." One Third Umbilical Cord from Mergo's Wet Nurse
-The words "Nightmare Slain" do not appear until after Mergo stops crying.
-Yharnam, Pthumerian Queen is right outside of the Wet Nurse's arena, sobbing with the front of her dress soaked in blood.
-It can be argued that Mergo is the Wet Nurse's surrogate although the term "wet nurse" seems to imply that she is just her nanny.

Description: 
A large humanoid being wearing a purple hooded cloak with a black necklace. She has two large feathered wings on her back and her eight arms are feathered as well. Her hands end in claws. She also wears black bracelets and rings.

Location:
From the Mergo's Loft Middle Lamp, exit the building and go up the stairs past the Crow-Dog creatures. At the top of the stairs to the left are the Shadows of Yharnam, head to the right and take the non-bird cage elevator up. When you exit you will see Queen Yharnam, go past her and take the elevator in front of her. Walk forward and you will enter the Wet Nurse's arena. Approach the baby carriage for the cutscene to play.

Combat:
-Weak to Bolt, Rapid Poison, and Arcane

The Wet Nurse's arena is a stone courtyard with columns around the outside and a baby carriage in the middle. Identical to the final layer Chalice Dungeon Bosses' arenas.

First Stage:
The Wet Nurse has several melee attacks, some with incredibly long reach. The first attack of note is a very slow flurry attack (s), where she will walk forwards swishing her blades in front of her signaled by her raising her top arms up. The next attack can one-shot you as it uses all blades, it's a very slow diagonal turning swipe (h), she will hold her arms out to the side before leaning to the right and swiping her blades up and to the left. She can modify this by doing up to three short alternating swipes (m), where she just brings all her arms up and to the left side. She can do a "hug" (m), where she wraps her arms around herself and swings them out. She can reach all of her arms out straight in front of her and then drag them across the ground (m). She can also teleport and do a flying attack  where slowly flies up towards you before "hugging" you again (m). The last thing she can do is coat the arena in a purple haze, she will raise her hood/trunk and a purple light will appear over her head. If you get her health past 70% during this she can start the second stage without stopping the purple haze.

Second Stage:
This starts at around 70% where she will spawn a doppelganger during the purple haze which will appear and attack. It has the normal swipe attack and the reach attack (m), where it can stretch its arms about halfway across the arena. The Wet Nurse will also become more aggressive.

Drops:
-72,000 Blood Echoes
-One Third of Umbilical Cord

Tips and Tricks:
-Any weapon +9 or higher will work well with Bolt Paper, although a Chikage transformed will work very well because of the Rapid Poison. 
-All the attacks have a slow windup and long recovery so evading and then attacking is fairly effective.
-The very slow walking attack is a great time to get behind and wail on her. If you do get hit it will be a very negligible part of your health.
- During the purple haze, the clone will disappear after one hit which will leave some free time to attack the real one. If not, just run counter clockwise and dodge when needed.
-For the flying attack, just dodge forward. and attack her back.

Glitches:
-You can die in co-op along with the beckoner and respawn in the boss arena with the Wet Nurse passive. Link
-Using the Madaras Whistle can make her invincible.Link

Damage Indicator:
Slight damage (s)
Moderate Damage (m)
Heavy Damage (h)
Stun (st)

Wednesday, January 27, 2016

Ebrietas, Daughter of the Cosmos

Ebrietas, Daughter of the Cosmos

Information:
Ebrietas is an optional boss located in the Upper Cathedral Ward and a Great One. Gain three Insight for finding her and three for killing her. Activates the Altar of Despair Lamp upon defeat.

Special Notes: Required to enter the Great Isz Chalice Dungeons.

Lore:
Ebrietas was one of the Great Ones who lay slumbering underground in the Pthumerian labyrinths. When the other Great Ones awoke and left the dungeons on the eve of the fall of the Pthumerians, they left Ebrietas behind to languish in the underground. She was eventually discovered by a group of Byrgenwerth scholars: Laurence, Micolash, and Carryl. Their fascination with her lead to them leaving Byrgenwerth to found the Healing Church to pursue research into the uses of her blood. The Church created a sect within themselves, the Choir, to care for and study her. She would gain a companion, near the end of the Church’s reign, in the form of the Celestial Emissary.

References and Dialogue:
-"Remnant of the eldritch Truth encountered at Byrgenwerth. Use phantasms, the invertebrates known to be the augurs of the Great Ones, to partially summon abandoned Ebrietas. The initial encounter marked the start of an inquiry into the cosmos from within the old labyrinth, and led to the establishment of the Choir." Augur of Ebrietas, used by upper members of the Healing Church such as Iosefka, Micolash, Yurie, and Edgar
-It is possible that the Ebrietas in the Chalice Dungeons exists in the Pthumerians' version of the Nightmare of Mensis and isn't the true Ebrietas but a creation of the Pthumerians' ritual.
-It is possible that the Celestial Larvae in Upper Cathedral Ward are the results of the experiments conducted on the orphans by members of the Choir.
-It is speculated that Ebrietas' "mouth" is not in fact a mouth but her mutilated head; sliced open by either the Choir or by the Pthumerians in an effort to take blood or for research as the skin appears flayed as well as reveals the eyes on the inside of her head.
-Ebrietas is Latin for "drunkenness" possibly a reference to the addictive nature of her blood.

Description:
Ebrietas, like Amygdala, has a Cthulu like appearance. She has a long vertical slit in her face, covered with tendrils around the opening and eyes lining the sides as well as two green, almost human, eyes on the outside of the slit. She has two arms ending in tentacle hands and two "legs" which resemble two snail tails trailing behind her. She also has partial wings surrounded by more tentacles that allow her to fly short distances. She slightly resembles a slug.

Location:
From the Lumenflower Gardens Lamp, break through the large window behind and continue along the balcony. At the back of the room there will be two Celestial Minions; operate the lift and head down the passage where you will enter Ebrietas' arena.

Summons:
-Old Hunter Damian of Mensis is the only summon available. He wields a threaded cane and uses mostly Arcane attacks like the Augur of Ebrietas. His summoning bell is located to the left of the doorway leading into Ebrietas' arena.

Combat:
-Weak to Bolt

Ebrietas' arena is a large pool of water with rock walls on the side. The entrance is a narrow passage and the end has a large statue in the middle. There are lots of nooks along the walls to beware of.

First Stage:
Ebrietas mainly uses melee attacks in the first half of the fight. She can do a head slam (h) that also has a partial flight variant, a very slow tentacle swing (h), and a frenzy inducing grab attack (h), which will one shot most players. She can also do a torso drop attack (h), where she will raise both tentacles above her head and bring her whole torso smashing down. Also, she can fly short distances (s) where take offs and landings can do some damage as well as a charge attack (h); she will rear up before leaning forward to run at you, the tentacles do the most damage in this instance. She may also spit blood that induces frenzy.

Second Stage:
Signalled by Ebrietas casting an "aura" around herself of Arcane particles at around fifty percent health, these will damage you when you are in melee range. She also begins spewing blood and will now use Arcane attacks, such as a Call Beyond (h), which will be signaled by a glowing blue light above her head. They will hit in a volley of three.

Drops:
-28,800 Blood Echoes
-Great Isz Chalice

Tips and Tricks:
-Option One: Use the summon. This makes the fight a little easier as you can switch off her focus between you and Damian. It will keep her from using her blood spewing attack and a Call Beyond as one of you will always be up against her restricting her to melee attacks. Be aware that in higher NGs she will most likely kill him in ten seconds so he's essentially worthless. Also make sure to hold her attention as much as possible otherwise he will die pretty quickly. Just use him as some respite to heal.
-Option Two: Shoot her in the head with a Cannon and drop her down. Visceral attack her, run up and Charge R2 to Visceral Attack again. Repeat. Evelyn upgraded with Bone Marrow Ash is equally viable.
-Option Three (Next Safest): "Orbiting" method. Circle around her just out of range of her melee attacks and after she has completed one of her attacks rush in to attack her chest or, preferably, her head. You can also use a long range weapon, Ludwig's Holy Blade or the Burial Blade, to R2 into her head drop attack (the version with her slamming her tentacles as well).
-Option Four: Stay close to her body and try to stay behind her while getting in hits when you can.
-Option Five: Provoke the head slam by hitting her in the chest and backing off only to return and attack her head. This is dangerous as the head slam can turn into a charge attack.
- Any weapon with Kin or Bolt damage is preferable. Something with a long overhead hit can keep hitting her head and staggering her.


Glitches:
-Ebrietas will be passive if killed in another hunter's world and you touch the Lamp. When you are transported back to your world go in the elevator and use the Bold Hunter's Mark. When spawned you will be in the boss arena and she will be passive. Link

Damage Indicator:
Slight damage (s)
Moderate Damage (m)
Heavy Damage (h)
Stun (st)

Saturday, January 23, 2016

Amygdala

Amygdala:

Information:
Amygdala is the only boss (optional) in the Nightmare Frontier and a Great One. Gain three Insight for finding it and three for killing it. Activates the Amygdala's Chamber Lamp.

Special Notes: Killing this boss is required to enter the Ailing Loran Chalice Dungeons.

Lore:
Amygdala was once one of the Great Ones slumbering beneath Yharnam along with Ebrietas, Daughter of the Cosmos. However, it transcended with the other Great Ones and now resides in its own domain, the Nightmare Frontier. In Yharnam, Amygdala is very obviously an object of great reverence as shown by the multitudes of Amygdala statues around Cathedral Ward and Yahar'gul; probably due to the upper members of the Healing Church being able to see the Lesser Amygdalae around those areas and believing it to be a similar being to their own Ebrietas. Other humans were unable to see them due to the fact that Rom the Vacuous Spider created a wall of sorts to keep them invisible.
Patches the Spider is an especially avid follower.

References and Dialogue:
-It is possible that the Amygdala in the Chalice Dungeons exists in the Pthumerians' version of the Nightmare of Mensis and isn't the true Amygdala but a creation of the Pthumerians' ritual.
-"The gift of the godhead will grant you strength.Oh Amygdala, Oh Amygdala. Have mercy on the poor bastard. What a joy it is, to behold the divine. It must be such a pleasure....You're nigh on a beast on the field, but here you are, treading a measure of the gods....Lord Amygdala. How did this come to pass? Hmph. Now, wait just a moment. Do you think ill of me, me?...Now, say in my heart, you were as a lamb to my god...On the good grace of a certain god, and the way he meted out his love....My god is lost to me, so I must away to find another... Oh, think not of poor Amygdala. Upon that piteous bastard, you bestowed salvation." Patches the Spider
-Amygdala is the Latin word for almond as well as being the fear center of the brain (also almond shaped). 

Description:
While the Lesser Amygdalae have a more Cthulu like appearance with tentacles and a slightly darker color, this Amygdala is lighter and is missing tentacles. It has a large almond shaped head covered with thousands of misshapen eyes and short "hairs". It has eight arms, each with six fingers, and two very heavily armored feet with talon-like claws. It has a short plated tail with fine whiskers protruding from the end.

Location:
From the Nightmare Frontier Lamp head to the left until the first Silverbeast, head down the passage directly in front of it and take the elevator down. It will let out by another Silverbeast, move past it and go down the raised path and enter the archway. If you have stepped in the poison lake you have done something wrong.

Combat:
Weak to Bolt, Fire, and Arcane
Strong against Blunt

Amygdala's arena is a circular courtyard surrounded by high walls. It is relatively flat and grassy with no real obstacles although there are nooks and crannies around the wall though.

First Stage:
Amygdala mostly sticks to melee attacks at this point although it is capable of firing a laser (h) at the hunter. Its eyes will become engorged and it will drag one long line across the ground and an explosion will follow a few seconds after. It will also stomp (m) and do a leaping attack (h), where it leaps up into the air before slamming down on you. It will also curl all its arms around its body and slam them out (m), as well as curl in pairs of its arms at a time (m). It can also do regular swipes (m) as well as slam all its hands down on the ground (h). Can also spew acid (m), by shaking its head wildly.

Second Stage:
After about half its health is gone, Amygdala will gain two new attacks. The first is a modification of the laser where it will instead fire in six short bursts (m) and during the hand slamming attack it will gain wormholes on its palms (Galaxy hands).

Third Stage:
At about a third of its health, it will gain increased reach by ripping off its arms and using them as weapons. Blood will now shoot in geysers from its back. It keeps all of its previous move set.

Drops:
-21,000 Blood Echoes
-Ailing Loran Chalice

Tips and Tricks:
-Ludwig's Holy Blade, Church Pick, or the Burial Blade +7 or higher in its transformed state is the best weapon when equipped with Bolt or Fire damage (paper or gem). Any weapon with a bit of reach is good as it can hit several of its arms at once.
-A Flamesprayer or Cannon +5 or higher can be used to deal damage to its head, enough will make it stagger, so that you can visceral attack it. Rush in after an attack, spray its head for a few seconds and retreat or shoot its head with Cannon and wait for it to drop to the ground. Using the Executioner's Gloves or Simon's Bowblade (DLC) is also possible.
-A Call Beyond does a hefty amount of damage.
- You can either stay in front of Amygdala and wait for it to do either version of the Galaxy hands attack. It will drop its head down and use that time to get in a few hits. If your stamina is depleted use the Flamesprayer.
-You can also stay to the side of Amygdala and wait for the attack animations to stop before hitting its arms or rushing underneath it to do overhead damage.
-If a long battle is alright, you can stay to the sides of its feet (be mindful of the curled arm attack as it hits behind) and swipe at its ankles and crotch (will deal about ten damage to the ankles). If you hit its legs enough it will collapse.
-Attacking its arms, hands and head to deal the most damage. Its ankles and tail are the most heavily armored although the crotch is vulnerable.
-To avoid the continuous laser attack continue to dodge to the side. Avoid the shorter laser attack by dodging erratically in all directions or just slowly walk to the sides.
-Molotov Cocktails can help speed the fight along. Make sure to lock onto the head or else they will be thrown towards the crotch.

Glitches:
-In the Chalice Dungeons, Amygdala can become stuck behind the ceiling while performing the leap attack. Link

Damage Indicator:
Slight damage (s)
Moderate Damage (m)
Heavy Damage (h)
Stun (st)

Friday, January 22, 2016

Celestial Emissary

Celestial Emissary:
Information:
The Celestial Emissary is a Great One and Optional Boss in the Upper Cathedral Ward. Gain 2 Insight for killing the boss. Activates the Lumenflower Gardens Lamp upon defeat.

Lore:
The Celestial Emissary is the successful experiment of the Choir to create a go between for the Great Ones and themselves. It was most likely successful because of the refined blood created by Iosefka; the minions in her clinic and in the Lumenflower Gardens were the less successful results of her experimentation.

References and Dialogue:
-It is possible that the Lumenflowers also precipitated the successful transformation while the Lumenwood could not.
-His minions can also be found in the Forbidden Woods.

Description:
Initially a small blue humanoid figure with a bulbous, gelatinous head with light blue, glowing particles floating inside. Although its limbs appear shriveled, it does have a a rather round torso. Later it grows to almost three times its size and will sprout glowing tentacles from where the blue particles were on its head.

Location:
From the Upper Cathedral Ward lamp go up the stairs through the gate (if opened) go up the stairs and down the passage. There will be a Celestial Minion in the passageway. Pass that and you will enter the boss arena.

Combat:
-Weak to Bolt

The Celestial Emissary's arena has three levels: a bottom level with lumenflowers, a second level that is pretty much a landing, and a third level on both sides that has rows of pillars on the side. There are also a bunch of respawning Celestial Minions. They will continue to run towards the hunter and flail their arms around (s) along with a slower swiping attack (s).

First stage:
The Celestial Emissary is disguised as one of the minions and mimics their attack patterns. However it tries to stay towards the back of the pack.

Second Stage:
At around half its health the Celestial Emissary will triple in size and its attacks will do significantly more damage. It keeps the flailing arms attack as well as gaining a body drop attack (h), where it will slam its torso into the ground. It will stomp in quick succession (m), lifting its leg alternately pounding its feet in the ground, and can do a two handed swipe attack (m), raising both its arms diagonally.

Third Stage:
With a third of its health left, the Emissary will sprout tentacles from its head and begin to use a laser attack (h). It will appear as a blue light around his head and shoot a sequence of six lasers in the hunter's direction.


Drops:
-24,640 Blood Echoes
-Communion Caryll Rune

Tips and Tricks:
-A Tonitrus +4 or higher is quite effective although a weapon with Bolt Paper or a Bolt enchantment will fair just as well. 
-A weapon with a long horizontal swipe, like the Hunter's Ax or Ludwig's Holy Blade, can be useful in mowing down the minions.
-Dealing with the minions is fairly easy. Just swipe a few times and that should give you free reign to wail on the Emissary. 
-If you need to heal go to the third level and duck behind the pillars. The boss will not follow you there although the minions will and this should buy the hunter some time.
-Staying close to the boss during the third stage will help keep him from doing the laser attack.

Glitches:
-The Emissary can become trapped if he transforms too close to the back wall. Link
-The Emissary can disappear after transforming. Link


Damage Indicator:
Slight damage (s)
Moderate Damage (m)
Heavy Damage (h)
Stun (st)
Saturday, January 2, 2016

Rom the Vacuous Spider

Rom the Vacuous Spider:


Information:
Rom the Vacuous Spider (female) is a Great One and the only boss in Byrgenwerth. Gain two insight for finding her and another two for defeating her. Once killed she activates the Moonside Lake Lamp.

Special Notes: The death of Rom the Vacuous Spider triggers the blood moon event where most of the NPC questlines will mostly become non existent without prior contact. This event also will make the Snatchers disappear from Cathedral Ward and the Forbidden Woods. 

Lore:
As a Great One, Rom the Vacuous Spider lives on a higher plane of existence granted to her by Kos or Kosm, another Great One. She was a scholar at Byrgenwerth until she was chosen to receive true enlightenment with the help and urging of Master Willem, her brother. She is the Great One in charge of the dimensional wall that renders the Lesser Amygdalas invisible from people with lower insight. The term "vacuous" is a in reference to her lack of wisdom as both a human and the youngest of the Great Ones. Her death enabled Micolash to complete his experiments and create his nightmare at the expense of all those living in Yahar'gul.

References and Dialogue:
-At the end of the fight, a cutscene begins with Yharnam, Pthumerian Queen in a white blood stained dress. She will look up at the blood moon slowly approaching her as baby Mergo cried in the background. "Ritual secret broken. Seek the nightmare newborn." appears on screen after being transported back to Cathedral Ward.
-"Once a young girl had an elder brother who was determined to become a doctor, and so she willfully became  his patient. In the end, this led to their encounter with the Eldritch Truth, for which they considered themselves blessed." Brain Fluid
-"Aah Kos, or some say Kosm. Do you hear our prayers? As you once did for the vacuous Rom. Grant us eyes, grant us eyes. Plant eyes on our brains to cleanse our beastly idiocy." Micolash, Host of the Nightmare.
-"The Byrgenwerth spider hides all manner of rituals, certain to reveal nothing, for true enlightenment need not be shared."  Note in the College.
-Hidetaka Miyazaki refers to Rom as a she.
-Rom the Vacuous Spider is actually Foolish Spider Roma in the original Japanese.


Description:
Rom the Vacuous Spider has a large stone-like head covered with eyes. She has a small mouth vertically slit and a wispy silvery tail. Her body is large, gray and covered in the same feathery substance as her tail. Her legs are very small and so she is quite slow moving.

Location:
Rom is located in the Moonside Lake, which is reached by entering the Lunarium after killing the NPC hunter who acts as a guard. After opening the door, you will see an old man (friendly NPC) in a wheel chair, Master Willem, who, when spoken to, will gasp and point towards the lake. Fall off the ledge into the glowing circle of water and you will enter Rom's domain.

Summons:
-You can summon the Younger Madaras Twin after equipping the Impurity Rune given by Valtr, who wields a Hunter's Ax with the occasional use of Fire Paper and a Hunter Blunderbuss. His bell is located in the courtyard directly below the Byrgenwerth Lamp.
-You may also summon Old Hunter Mensis Scholar Damian, who wields a threaded cane but mostly uses ranged arcane attacks. He can also use the Augur of Ebrietas. His bell is located to the left of the Lunarium door.
-The last summon available is Old Hunter Henryk, who is available after his death in the Eileen the Crow questline. He wields a Saw Cleaver and a Hunter's Pistol . His lamp is located to the right of the Lunarium door by the chest.

Combat:
-Slight weakness to Arcane and Fire
-Serious weakness to Bolt

Rom the Vacuous Spider's arena is, what looks like, a boundless stretch of water although the arena does have invisible walls surrounding it. She will be surrounded by a horde of spiders, that look like miniature versions of her, that can lash out with their legs (m), jump forward in quick succession and make a grabbing motion with their legs (m), spew venom (s), and leap into the air and land on their heads (h). They can easily be killed by dodging to the side of them and attacking their body as their heads are very heavily armored.  These spiders will appear around her every time she teleports.


First Stage:
Rom is very docile and typically backs away from you or tries to keep her armored head in front of you in this stage. The only damage that can be dealt is from the spiders surrounding her. She will teleport after you have taken around a third of her health and have not dealt continuous damage.

Second Stage:
Rom is now at a different part of the map again surrounded by more spiders. It is possible to trigger stage three if you dealt enough damage in stage one. She can now summon comets down from the sky (h), she will rear up and when she touches down they will start; can summon comets from underwater if you are too close to her (h), she will roll onto her back and make a u-shape with her body; and she will do an A.O.E. attack (h), she will lift up her head and tail and slam it down.

Third Stage:
The only difference between the third and second stage is that Rom can now "flail" around as an attack (h).

Drops:
-Kin Coldblood (12)
-24,860 Blood Echoes
-Lower Pthumera Root Chalice
-The spiders surrounding her will occasionally drop a Madman's Knowledge.

Tips and Tricks:
-Don't use a summon as they increase Rom's health and will most likely die at the beginning of Stage Two. If you are to use one, use Damian because of his long range attacks.
-The best weapon for this fight is the Whirligig Saw +5 or higher equipped with Bolt Paper. Walk up and just hold L2 against him.
-The next best weapons would be Ludwig's Holy Blade, the Holy Moonlight Sword, Logarius Wheel, and the Amygdalan Arm with Bolt Paper because of the extra Arcane damage, higher durability, and longer reach (except for the Logarius Wheel).
-The Tonitrus is a good weapon if you are having issues with this boss as it will keep the cost of Bolt Paper down and has a little extra Arcane damage.
- In Stage one, you can use a Flamesprayer +4 with Bone Marrow Ash as a way to continue doing damage on Rom when your stamina runs out
- In the first stage of the fight wipe out the spiders around Rom to give the most time to attack her, if you bring a Flamesprayer, attack first with the buffed weapon of choice and then use the Flamesprayer when your stamina runs out.
- In the second stage keep in mind that the comets track your motion so dodge in erratic motions to avoid getting hit while keeping a safe distance from the spiders.
-If you want to kill the spiders in the second and third stage be wary of the comets so always keep an eye on Rom. Kill one and dodge the comets, rinse and repeat.
-If you don't want to deal with the spiders in the second and third stage try to lead the spiders to one side of Rom so that you can dodge to her other side in order to get off a few hits. Retreat and wait again for the next opportunity.
-Be patient.

Glitches:
-If you are inside of her turn radius while she is teleporting she will sometimes stop teleporting.
-In co-op, if you wait at the spawn point you will start to see other spiders spawning around the arena. These will all be docile. The spiders next to Rom will be active but whenever she teleports there will only be the docile spiders that you didn't kill present.  Link

Damage Indicator:
Slight damage (s)
Moderate Damage (m)
Heavy Damage (h)
Stun (st)