Friday, January 29, 2016

Witch of Hemwick

Witch of Hemwick


Information:
The Witch of Hemwick is the only boss in the Hemwick Charnel Lane. Gain one Insight for finding her and two for killing her. Activates the Witch's Abode Lamp.

Special Notes: Although not needed for progression, the Witch does guard the Rune Workshop tool.

Lore:
The Witch of Hemwick is a body snatcher operating for the Healing Church, specifically a variant of an Eye Collector. The Healing Church, specifically the School of Mensis, used body parts to do Chalice Rituals in order to explore the dungeons and used carriages as a transport between Yahar'gul and Hemwick Charnel Lane to ship the bodies.

References and Dialogue:
-The Amalgams in Yahar'gul might not actually be mutated people but rather reanimated body parts.
-The hunter at the end of the arena is thought to be Runesmith Caryll. 
-The Cainhurst Carriage also goes through the same waypoint as the Yahar'gul carriages.

Description:
A hunched over old woman, holding an archaic scoop in her hand. Her cloak is covered in the eyes of her victims.

Location:
From the Hemwick Charnel Lane Lamp, go down the hill and then up the stairs past the Scythe Wolf. Continue up to the Molotov throwing woman, you will pass a Brick Troll. Go through the gate and past the two Executioners. Go up the hill and there will be another Executioner off to the right. Enter the building just up ahead and go down the stairs.

Combat:
Strong against Bolt

The Witch's arena is a long room with barrels in the corner. There are two ramps on either side of the room with drop offs leading to the center. Scythe Wolves will continuously spawn around the arena.

First Stage:
The Witch will teleport around the room. If she gets behind you she can do a throat cutting attack (h). There is also an A.O.E.(h) which it very rarely does signified by it casting a red light. She can also do a series of quick slashes (m) and an attack like the Brainsuckers where she casts a blue light and it will paralyze you leaving you open to attacks.

Second Stage:
The Witch will spawn a doppelganger that will show its health bar after the first Witch is dead and they can keep resurrecting each other.

Special Notes: In co-op, only the host can see the Witch.

Drops:
-11,800 Blood Echoes
-Bloodshot Eyeball 4x

Tips and Tricks:
-Do not engage the Scythe Wolves unless there is minimal damage to the Witch and there are already three. If you have a strong enough weapon you can deal with them one at a time in between the Witch's disappearances.
-Do not sprint, run slowly around. A small light in a fog of red can be a good indication of where the Witch is. If not just keep moving around and she will eventually pop up. 
-Kill her quickly to avoid more doppelgangers being summoned. A weapon +5 or higher will work fine.

Glitches:
-The second Witch can gain a health bar before the first Witch is dead. Link

Damage Indicator:
Slight damage (s)
Moderate Damage (m)
Heavy Damage (h)
Stun (st)

Ludwig, The Accursed and Holy Blade

Ludwig, The Accursed and Holy Blade

Information:
Ludwig is the first boss in the Hunter's Nightmare. Gain one Insight for finding him and three for killing him. Activates the Underground Corpse Pile Lamp.

Special Notes: Ludwig is referenced as two different names in the boss fight, first as Ludwig, the Accursed and then as Ludwig, the Holy Blade hence the title. Also, Ludwig is still alive after the boss fight and will drop the Holy Moonlight Sword if killed or spoken to while wearing Church Garb.

Lore:
Ludwig is the first of the Healing Church Hunters, part of the group that was formed after Gerhman's group was deemed a failure when they were finally revealed to the public after the fall of Old Yharnam. Ludwig then became head of the Church Hunters, and after witnessing the transformation of Clerics into bigger beasts championed a much larger and heavier weapon, Ludwig's Holy Blade. He would become a legend among the people of Yharnam along with his Church Hunters but was forced into recruiting normal civilians when the beasts became too strong. The guilt of their deaths and his early exposure to the old blood brought him to the brink of beast hood many a time until he found the Holy Moonlight Sword and the Guidance Rune that accompanied it. Here he thought he had found his savior, in the form of the sprites he now saw while closing his eyes. Their whispers kept the fears at bay and allowed to him to continue fighting although with a terrible price. Ludwig became something more terrible than other clergyman had ever become and for his sins he was exiled to the Hunter's Nightmare. Despite this betrayal he still listens to the voices of his guiding moonlight in the hopes that they will one day bring him salvation.

References and Dialogue:
-"-"Ahh, ahh, please...help us...ah... An unsightly beast. A great terror looms! Ahh. Ludwig the Accursed is coming. Have mercy...Have mercy upon us..." Skeleton in Ludwig's arena
-"Aah, you were at my side, all along. My true mentor...My guiding moonlight." Ludwig
-Without Church Garb on, "Good hunter, have you seen the thread of light? Just a hair, a fleeting thing, yet I clung to it, steeped as I was in the stench of blood and beasts. I never wanted to know, what it really was. Really, I didn't."
-With Church Garb on, "Tell me, good hunter of the Church. Are my Church hunter the honorable spartans that I hoped they would be?" If prompted yes, "Aah, good...that is a relief. To know I did not suffer such denigration for nothing. Thank you kindly. Now I may sleep in peace. Even in this darkest of nights, I see...the moonlight...". If prompted no, "Oh, my. Just as I feared. Then a beast-possessed degenerate was I, as my detractors made eminently clear. Does the nightmare ever end?!
-"A Caryll rune discovered by the old hunter Ludwig along with the Holy Moonlight Sword. When Ludwig closed his eyes, he saw darkness, or perhaps nothingness, and that is where he discovered the tiny beings of light. Ludwig was certain that these playful dancing sprites offered "guidance" and emptied Ludwig of his fear at least in the midst of the hunt." Guidance Rune
-"An arcane sword discovered long ago by Ludwig. When a blue moonlight dances around the sword, and it channels the abyssal cosmos, its great blade will hurl a shadowy lightwave. The Holy Moonlight Sword is synonymous with Ludwig, the Holy Blade, but few have ever set eyes on the great blade, and whatever guidance it has to offer, it seems to be of a very private, elusive sort." Holy Moonlight Sword
-"Oh, he's well and truly gone, now. A tragic figure. But he will shame himself no longer. He dies with his ideals untarnished. He was a true hero, and earnt that much, at least. Here, this is Ludwig's guiding light. The blinding thread, that lead, and mislead, that consummate hero. The poor brute." Simon the Harrowed
-"A trick weapon typically used by Healing Church Hunters. It is said that the silver sword was employed by Ludwig, the first hunter of the church. When transformed, it combines with its sheath to form a greatsword. It exhibits several departures from the workshop's design, suggesting that the Church anticipated much larger inhuman beasts."  Ludwig's Holy Blade
-"Ludwig was the first of many Healing Church hunters to come, many of Whom were clerics. As it was, clerics transformed into the most hideous of beasts." Sword Hunter Badge
-"The radiant sword indicates the heirs to the will of Ludwig. These hunters, also known as the Holy Blades, are what remains of an ancient line of heroes that date back to a very early age of honor and chivalry." Radiant Sword Hunter Badge
-"Ludwig, the first hunter of the Healing Church, once recruited Yharnamites to serve as hunters. This hunter's attire was made for new recruits, and has excellent straightforward defense. But not nearly enough to allow an ordinary man to stand any real chance against the beasts." Yharnam Hunter's Garb.
-Ludwig is wearing what looks to be a slightly modified version of the Executioner's Garb, which was the known inspiration for the Church Garb, proof that he was the first Healing Church Hunter.
-Ludwig, the Holy Blade is named after Ludwig Van Beethoven, the composer of the Moonlight Sonata.
-The inside of Ludwig's mouths are covered in eyeballs showing a great amount of insight.
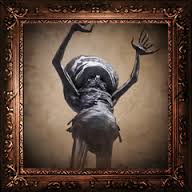

Description:
Ludwig is a stunted twisted beast who's malformed body can only be described as an amalgamation of distorted limbs. He has several limbs sticking out from his body, mostly deformed variants of horses legs while his front two arms, the largest, have long claws. He has two "heads" the first more like a growth on his shoulder revealing a mouth with the inside covered in eyes while his other head resembles that of a horse although it is just an extremely elongated face. He is blind in his right eye.

Location:
From the Nightmare Church Lamp, continue out the door and past the gate. There will be a path continue down this and turn right, right next to the gate. There will be an Eye Collector to the right. At the gate, there will be a skeleton tapping that will drop five Blood Vials. Continue past the Carrion Crows and enter the passage.

Summons:
-Old Hunter Henriett wields the Kirk Hammer and Hunter's Pistol and is located down the stairs from the Nightmare Church Lamp.
-Confederate Younger Madaras Twin is available if the Impurity Rune is equipped. He wields a Hunter Blunderbuss and a Hunter's Ax, equipped with Fire Paper. His Summoning Bell is located in the small passage behind and to the right of the ax-wielding Nightmare Executioner.
-Old Hunter Valtr is available for summoning if he is alive and the Impurity Rune is equipped. He wields a Whirligig Saw. His Summoning Bell is located next to the gate with the banging skeleton.

Special Notes: Valtr and the Madaras Twin can be summoned together but Henriett will cancel out their summons.

Combat:
-Weak to Fire, Serration, and Bolt

Ludwig's Arena is a large cavernous room with a bloody pool as the floor. There are patches of skeletal bodies piled on the floor. There are several nooks to get stuck on along the wall and particularly around the staircase area that leads to a small platform with a body.

First Stage:
Ludwig is considered a beast-type in this stage and will stay on all fours throughout the first half of his health.   He also has one charge attack, one that is heralded by a nose poke (m) that can throw you up in the air before the actual charge attack (h). His shorter range attacks include a spin attack (h) where he will utter a scream as he winds up to the left and then swings his whole body in an arc, and a series of three swipes (m), where he will swipe left to right, drag his hand across the ground, and then swipe again. These can also occur after a bite attack (m). He can also leap into the air and slam down with one hand (h). He can also do a series of retreating swipes (m), where he will back up very quickly and swipe at the ground. He also has one drop attack now, a move very similar to the Cleric Beast, where he drops down almost immediately (h).

Second Stage:
At around seventy five percent health, Ludwig becomes more aggressive and gains a few new attacks. The two Arcane attacks are a spew attack (s), where he spews glowing liquid from his mouth in a wide arc from left to right; the other is one quick spit in your direction (m). He also gains another charge attack (h), which can one shot you where he paws at the ground like a bull and charges. The second drop attack (h) he does is where he will stay on the ceiling and blood will drip down three times before he drops. He can also do a bite flurry (m), where he can do up to seven bites in quick succession. If underneath or behind him too long he will buck twice (h) and then swipe once (m).

Third Stage:
At around fifty percent health, a short cutscene will play and Ludwig will gain the Holy Moonlight Sword along with a very powerful A.O.E. He is now on two legs and will slowly plunge the sword into the ground to signal the A.O.E.(h). He will also do several diagonal slashes if in front of him (m), as well as some long range Arcane swipes (m), that will throw arcs of light at the hunter. There is also a alternate version where he will charge for a bit before releasing one long arc of light (h). He will do a single left slash before following it up with another slash and two smashes (h) as well as a retreating slash-slash smash combo (h), which will be two handed. He can thrust at you (m) as well as do something similar to an A.O.E. on his blade (h), where he will hold the sword in front of his face to charge up before slamming it down. Energy will shoot from the blade towards the ceiling as it lands.

Drops:
-34,500 Blood Echoes
-Holy Moonlight Sword
-Guidance Rune

Tips and Tricks:
-Best weapon choices so far include; Saw Cleaver, Beasthunter Saif, Beastcutter, Whirligig (with lots of stamina), Chikage and Church Pick.
-Wear clothing that protects well against physical and Arcane damage.
-Equipping runes that increase stamina are very very helpful. Make sure to have the Impurity rune equipped if you intend to summon.
-The hardest part of this fight is finding time to heal.
-Summoning Younger Madaras Twin and Master Valtr can be very helpful. Attack for a bit, back away when your stamina is out or you need to heal and let them aggro him. Be careful to watch their health bars, especially Master Valtr's as he will survive longer than the Younger Madaras Twin and attack Ludwig to let them heal as well. Keep in mind that this will increase his health.
-For the first stage, try to roll through his swipes and attack him on the sides. They can be damaged in much the same way as other bosses' legs and it will do massive damage to focus on one side. He does not heal them. Do not go behind him as he will kick out and staying under him will elicit the bucking attack.
-He will do the exact same leaping attack every time you enter the arena so use this guaranteed opportunity to get off a couple of hits.
-Ludwig's head is very vulnerable and is a good place to hit although its also very dangerous as most attacks with an overhead swipe are very slow. This is where you visceral attack for the first stage.
-Dodge to the left to avoid the charge attack as it does track slightly and is very fast. He has the large arm on the right side which makes him a bit wider so left is best.
-The arcane spew doesn't do much damage and is an excellent time to get to his side for a few hits.
-Be aware that if you stay in front of him he will bite or head butt you so always be ready to jump to the side. The bite won't do much damage but the head butt can lead into a charge and inflict serious damage.
-During the bite flurry, dodge into him when he bites the fourth time.
-During the swipe combo, dodge in during the drag attack or right before the final two slashes.
-During his spin attack wait for him to begin it and then dodge into it for a few hits. Alternatively you can hang back and wait for him to do the quick jumping swipe after and dodge through that.
-When he does his prolonged drop attack just run in a straight line.
-For the third stage focus on dodging each Arcane attack individually instead of just spamming.
-Do not get hit by his attack with the burst of energy from the blade. Back off to avoid the initial A.O.E. and then get very close to him again. Wait until he is just about to bring the blade down and dodge to the side. This is another good time to heal up if you have dodged the attack.
-The sword smashes will hit the hardest and just dodge to the side to avoid them. He can only do three of them in a row.
-Be aware that he can change the timing of his swings so if you intend on rolling forward right before he swings he will most likely hesitate and hit you when you are right against him. This can also make it seem like he is finishing a combo when he is actually just waiting for you to come closer for the last hit.
-His A.O.E. has a pretty small diameter but still try to back up as he can attack very quickly after that. This can be a great time to heal up though.
-The Old Hunter Bone is very useful in this fight.
-When visceral attacking in stage two be mindful that the place to hit is his crotch.
-A Cannon can be used, although it's not suggested due to Ludwig's speed at least in the first and second stage of the fight.

Glitches:
-In co-op, Ludwig can die right after the cutscene for the second stage. Link
-If the player dies right as the middle cutscene plays their blood echoes will be lost.

Damage Indicator:
Slight damage (s)
Moderate Damage (m)
Heavy Damage (h)
Stun (st)

Wednesday, January 27, 2016

Ebrietas, Daughter of the Cosmos

Ebrietas, Daughter of the Cosmos

Information:
Ebrietas is an optional boss located in the Upper Cathedral Ward and a Great One. Gain three Insight for finding her and three for killing her. Activates the Altar of Despair Lamp upon defeat.

Special Notes: Required to enter the Great Isz Chalice Dungeons.

Lore:
Ebrietas was one of the Great Ones who lay slumbering underground in the Pthumerian labyrinths. When the other Great Ones awoke and left the dungeons on the eve of the fall of the Pthumerians, they left Ebrietas behind to languish in the underground. She was eventually discovered by a group of Byrgenwerth scholars: Laurence, Micolash, and Carryl. Their fascination with her lead to them leaving Byrgenwerth to found the Healing Church to pursue research into the uses of her blood. The Church created a sect within themselves, the Choir, to care for and study her. She would gain a companion, near the end of the Church’s reign, in the form of the Celestial Emissary.

References and Dialogue:
-"Remnant of the eldritch Truth encountered at Byrgenwerth. Use phantasms, the invertebrates known to be the augurs of the Great Ones, to partially summon abandoned Ebrietas. The initial encounter marked the start of an inquiry into the cosmos from within the old labyrinth, and led to the establishment of the Choir." Augur of Ebrietas, used by upper members of the Healing Church such as Iosefka, Micolash, Yurie, and Edgar
-It is possible that the Ebrietas in the Chalice Dungeons exists in the Pthumerians' version of the Nightmare of Mensis and isn't the true Ebrietas but a creation of the Pthumerians' ritual.
-It is possible that the Celestial Larvae in Upper Cathedral Ward are the results of the experiments conducted on the orphans by members of the Choir.
-It is speculated that Ebrietas' "mouth" is not in fact a mouth but her mutilated head; sliced open by either the Choir or by the Pthumerians in an effort to take blood or for research as the skin appears flayed as well as reveals the eyes on the inside of her head.
-Ebrietas is Latin for "drunkenness" possibly a reference to the addictive nature of her blood.

Description:
Ebrietas, like Amygdala, has a Cthulu like appearance. She has a long vertical slit in her face, covered with tendrils around the opening and eyes lining the sides as well as two green, almost human, eyes on the outside of the slit. She has two arms ending in tentacle hands and two "legs" which resemble two snail tails trailing behind her. She also has partial wings surrounded by more tentacles that allow her to fly short distances. She slightly resembles a slug.

Location:
From the Lumenflower Gardens Lamp, break through the large window behind and continue along the balcony. At the back of the room there will be two Celestial Minions; operate the lift and head down the passage where you will enter Ebrietas' arena.

Summons:
-Old Hunter Damian of Mensis is the only summon available. He wields a threaded cane and uses mostly Arcane attacks like the Augur of Ebrietas. His summoning bell is located to the left of the doorway leading into Ebrietas' arena.

Combat:
-Weak to Bolt

Ebrietas' arena is a large pool of water with rock walls on the side. The entrance is a narrow passage and the end has a large statue in the middle. There are lots of nooks along the walls to beware of.

First Stage:
Ebrietas mainly uses melee attacks in the first half of the fight. She can do a head slam (h) that also has a partial flight variant, a very slow tentacle swing (h), and a frenzy inducing grab attack (h), which will one shot most players. She can also do a torso drop attack (h), where she will raise both tentacles above her head and bring her whole torso smashing down. Also, she can fly short distances (s) where take offs and landings can do some damage as well as a charge attack (h); she will rear up before leaning forward to run at you, the tentacles do the most damage in this instance. She may also spit blood that induces frenzy.

Second Stage:
Signalled by Ebrietas casting an "aura" around herself of Arcane particles at around fifty percent health, these will damage you when you are in melee range. She also begins spewing blood and will now use Arcane attacks, such as a Call Beyond (h), which will be signaled by a glowing blue light above her head. They will hit in a volley of three.

Drops:
-28,800 Blood Echoes
-Great Isz Chalice

Tips and Tricks:
-Option One: Use the summon. This makes the fight a little easier as you can switch off her focus between you and Damian. It will keep her from using her blood spewing attack and a Call Beyond as one of you will always be up against her restricting her to melee attacks. Be aware that in higher NGs she will most likely kill him in ten seconds so he's essentially worthless. Also make sure to hold her attention as much as possible otherwise he will die pretty quickly. Just use him as some respite to heal.
-Option Two: Shoot her in the head with a Cannon and drop her down. Visceral attack her, run up and Charge R2 to Visceral Attack again. Repeat. Evelyn upgraded with Bone Marrow Ash is equally viable.
-Option Three (Next Safest): "Orbiting" method. Circle around her just out of range of her melee attacks and after she has completed one of her attacks rush in to attack her chest or, preferably, her head. You can also use a long range weapon, Ludwig's Holy Blade or the Burial Blade, to R2 into her head drop attack (the version with her slamming her tentacles as well).
-Option Four: Stay close to her body and try to stay behind her while getting in hits when you can.
-Option Five: Provoke the head slam by hitting her in the chest and backing off only to return and attack her head. This is dangerous as the head slam can turn into a charge attack.
- Any weapon with Kin or Bolt damage is preferable. Something with a long overhead hit can keep hitting her head and staggering her.


Glitches:
-Ebrietas will be passive if killed in another hunter's world and you touch the Lamp. When you are transported back to your world go in the elevator and use the Bold Hunter's Mark. When spawned you will be in the boss arena and she will be passive. Link

Damage Indicator:
Slight damage (s)
Moderate Damage (m)
Heavy Damage (h)
Stun (st)

Tuesday, January 26, 2016

Micolash, Host of the Nightmare

Micolash, Host of the Nightmare
Information:
Micolash, Host of the Nightmare is one of two bosses in the Nightmare of Mensis/Mergo's Loft area. Gain two Insight for finding him and two for killing him. Activates the Mergo's Loft Middle Lamp

Special Notes: Arianna will disappear from Oedon Temple, if you put her there. She will appear in the tunnel between the Tomb of Oedon Lamp and the Cathedral Ward Lamp.

Lore:
Micolash was an old student of Byrgenwerth, one of the group led by Laurence, the First Vicar, that left to form the Healing Church after finding Ebrietas, Daughter of the Cosmos. He either discovered her with Laurence when they found her in the Chalice Dungeons or later met her through the Healing Church. While in the Healing Church, Micolash formed his own sect, the School of Mensis, that would late become more and more separated from the Church due to their disapproval of his experiments. This forced Micolash to move his experiments and school to Yahar'gul, the Unseen Village to continue his work in privacy and without interruption. Their work was very similar to that of the Byrgenwerth Scholars, aimed solely at summoning a Great One. Unfortunately, they were unsuccessful until the death of  Rom, the Vacuous Spider, which removed the barrier between humans and the Lesser Amygdalas, leading to the deaths or mutations of all in Yahar'gul while their consciousnesses were moved to the Nightmare of Mensis. There, many were still transformed, although Micolash remained in his human form although now insane.

References and Dialogue:
-"Aah Kos, or some say Kosm. Do you hear our prayers? We should not abandon the Dream. No one can catch us, no one can stop us now. Ooh! A hunter is a hunter even in a dream. But, alas, not too fast! The nightmare swirls and churns unending! As you once did for the vacuous Rom. Grant us eyes, grant us eyes. Plant eyes on our brains to cleanse our beastly idiocy. The grand lake of mud, hidden now, from sight. The cosmos, of course! Let us sit about, and speak feverishly. Chatting into the wee hours..new ideas, of the higher plane! Now I'm waking up, I'll forget everything." Micolash, Host of the Nightmare
-His skeletal body can be found in Yahar'gul sitting in the chair in the middle of a lecture room. The bodies of his students will be surrounding him. 
-Micolash is responsible for the summoning of Mergo's Wet Nurse and is knowledgeable of several more Great Ones: Kos, Ebrietas, Rom, and possibly the Moon Presence, as he seems aware of the Hunter's Dream.
-Like the Nightmare Frontier, the Nightmare of Mensis is linked to the Byrgenwerth Lecture Building.
-The One Reborn is a result of the experiments in Yahar'gul. The mutated people there are similar to the students of Byrgenwerth, transformed by the creation of Rom.
-Edgar, Choir Intelligencer, appears to have been in Yahar'gul at the time of the experiments, investigating Micolash, but was instead transported to the Nightmare of Mensis after the successful ritual.
-Micolash appears jealous of Rom's transcendence and only seems to want to continue his life in order to remember all that he has learned and edge ever closer to the Great Ones.

Description:
A man wearing a Mensis Cage and a tattered Byrgenwerth Student's Uniform. He is quite visibly insane and laughs maniacally during his dialogue.

Location:
From the Nightmare of Mensis Lamp, run up the hill to the left past the Silverbeasts. You will enter a building where spiders will drop down from the ceiling. Continue to the back of the room and head up the stairs to the right past  the bridge and Edgar, Choir Intelligencer. You will enter another building; head down the staircase directly in front of you and keep heading down. There will be a room missing floors dead ahead, move across that room carefully and then take the elevator in the back up. Go to the right after exiting the elevator room past the Dog/Crows and up the stairs. Enter the building next to the pair of elevators and cross the bridge. A short cutscene will play as you run into the next room signalling the boss fight.

Combat:
-Weak to Fire and Bolt

Micolash's arena is a foggy labyrinth of staircases and rooms. Ethereal Walkers (puppets) will appear in almost every hallway and they can deal a significant amount of damage. The second half of the arena only becomes available when Micolash is at half health. There will be a spiral staircase guarded by Crossbow Mannequins (tinmen) leading to the second level. The second level is almost an exact replica of the first except there are several holes in the floor to drop down in. 

First stage:
Micolash will appear randomly within his course in the first part of the arena. Lock on to him and chase him and he will lead you to a small room with two puppets. In this stage, he will only do two attacks: a shove (s) and the Augur of Ebrietas (h/st), which while not the heaviest hitting attack he can do it can stagger you or kill you if he does them in quick succession. He will shove  his palm towards you while throwing back his head and glowing blue.

Second Stage:
Micolash will "die" at half health. At this point run up the stairs into the second half of the arena. There are a few things that he can do at this point: he can run upstairs and then down a short flight of stairs and drop down through a hole in the wall, or he can run all the way upstairs and jump into a mirror. He will run out of the mirror in the same room as he would drop down through. Pick up the Iron Door Key next to the mirror he initially went through if you plan to drop down. If you drop down then you will chase him for a short distance before an iron door will slam down. Run back up the stairs until you are at a balcony with a lamp across a chasm. Go to the right side of the balcony and there is a small staircase leading down and there will be a hole where you can drop down again and fight Micolash.  He will be below and will gain one A.O.E. attack, a Call Beyond (h). He will raise his fists above his head and glow blue before crushing something in his hands that will shower glowing lights in a circle around him.

Drops:
-48,400 Blood Echoes
-Mensis Cage

Tips and Tricks:
-You can catch up to him and attack him while he is running but this will cause him to disappear and reappear at random points on his course.
-Never run up to him from the front, always dodge to the side while approaching him to avoid the Augur of Ebrietas attack.
-There are only two instances that you will be running down stairs. If you are going downstairs and it doesn't end in a room with a hole in the middle with Micolash VISIBLY in it, then you are going the wrong way. Head upstairs again.
-Lock on to him and just run after him around for the first chase. Killing the Puppets in the arena can help make the chase more tolerable without wasting Blood Vials.
-At the three points where Micolash will be waiting in a room below you, there are two that are the easiest to cheese him in. If he runs straight to the room and drops down, throw two poison knives and allow him to run it off and throw another two. Do this until he dies. If you run out, Molotovs will take out about 170 HP each time but be mindful not to fall down with the forward momentum from throwing them. Simon's Bowblade is very helpful as well but the charged R2 will not work in bow form, so just R1.
-If he jumps through the mirror, you can alternate between hitting him with projectiles in the room and running up the stairs to the original mirror and attacking it as he can take damage through it. Alternately, drop down after him and allow the door to slam down and then go upstairs and grab the Iron Door Key. Run up the stairs until you reach the balcony separated from a Lamp on the other side and go to the room on the right and shoot him from there. He will behave less erratically if shot at in this room.
-Another alternative, if you know which room he drops down in is to stay outside the room and hit him with projectiles that way.
-If you do choose to follow him from the get go, it is possible to stop the gate from slamming by doing a plunge attack. He will then fight you in that room and will be able to do a Call Beyond.
-If you choose to fight him one on one, a heavy weapon is best to stunlock him to keep him from using a Call Beyond. You can also use the Loch Shield and wear the Blindfold Cap and Church Garb for the Arcane defense.
-The best weapon to cheese this fight is Simon's Bowblade as his AI requires you to be a certain distance from him in order to continue. So you can stand back and shoot him to death with R1's as the charged R2 won't work.
-Parrying with a gun doesn't seem very effective to induce visceral attacks, but a Charged R2 behind him will.
-In Co-op, you can have someone physically block the door in order to allow the other person to give chase and attack. For the first stage block the hallway leading to the room that you would typically fight in. For the second stage block the hallway leading to the hole that he drops down through.
-You can roll through the A.O.E. blast of a Call Beyond if timed correctly.

Glitch:
-Micolash can become stuck in the back corner of the room and will fall out of the arena.1:10
-Micolash can become "stuck" in the mirrors.
-Micolash can trap you in the gated room. Link

Damage Indicator:
Slight damage (s)
Moderate Damage (m)
Heavy Damage (h)
Stun (st)

Saturday, January 23, 2016

Amygdala

Amygdala:

Information:
Amygdala is the only boss (optional) in the Nightmare Frontier and a Great One. Gain three Insight for finding it and three for killing it. Activates the Amygdala's Chamber Lamp.

Special Notes: Killing this boss is required to enter the Ailing Loran Chalice Dungeons.

Lore:
Amygdala was once one of the Great Ones slumbering beneath Yharnam along with Ebrietas, Daughter of the Cosmos. However, it transcended with the other Great Ones and now resides in its own domain, the Nightmare Frontier. In Yharnam, Amygdala is very obviously an object of great reverence as shown by the multitudes of Amygdala statues around Cathedral Ward and Yahar'gul; probably due to the upper members of the Healing Church being able to see the Lesser Amygdalae around those areas and believing it to be a similar being to their own Ebrietas. Other humans were unable to see them due to the fact that Rom the Vacuous Spider created a wall of sorts to keep them invisible.
Patches the Spider is an especially avid follower.

References and Dialogue:
-It is possible that the Amygdala in the Chalice Dungeons exists in the Pthumerians' version of the Nightmare of Mensis and isn't the true Amygdala but a creation of the Pthumerians' ritual.
-"The gift of the godhead will grant you strength.Oh Amygdala, Oh Amygdala. Have mercy on the poor bastard. What a joy it is, to behold the divine. It must be such a pleasure....You're nigh on a beast on the field, but here you are, treading a measure of the gods....Lord Amygdala. How did this come to pass? Hmph. Now, wait just a moment. Do you think ill of me, me?...Now, say in my heart, you were as a lamb to my god...On the good grace of a certain god, and the way he meted out his love....My god is lost to me, so I must away to find another... Oh, think not of poor Amygdala. Upon that piteous bastard, you bestowed salvation." Patches the Spider
-Amygdala is the Latin word for almond as well as being the fear center of the brain (also almond shaped). 

Description:
While the Lesser Amygdalae have a more Cthulu like appearance with tentacles and a slightly darker color, this Amygdala is lighter and is missing tentacles. It has a large almond shaped head covered with thousands of misshapen eyes and short "hairs". It has eight arms, each with six fingers, and two very heavily armored feet with talon-like claws. It has a short plated tail with fine whiskers protruding from the end.

Location:
From the Nightmare Frontier Lamp head to the left until the first Silverbeast, head down the passage directly in front of it and take the elevator down. It will let out by another Silverbeast, move past it and go down the raised path and enter the archway. If you have stepped in the poison lake you have done something wrong.

Combat:
Weak to Bolt, Fire, and Arcane
Strong against Blunt

Amygdala's arena is a circular courtyard surrounded by high walls. It is relatively flat and grassy with no real obstacles although there are nooks and crannies around the wall though.

First Stage:
Amygdala mostly sticks to melee attacks at this point although it is capable of firing a laser (h) at the hunter. Its eyes will become engorged and it will drag one long line across the ground and an explosion will follow a few seconds after. It will also stomp (m) and do a leaping attack (h), where it leaps up into the air before slamming down on you. It will also curl all its arms around its body and slam them out (m), as well as curl in pairs of its arms at a time (m). It can also do regular swipes (m) as well as slam all its hands down on the ground (h). Can also spew acid (m), by shaking its head wildly.

Second Stage:
After about half its health is gone, Amygdala will gain two new attacks. The first is a modification of the laser where it will instead fire in six short bursts (m) and during the hand slamming attack it will gain wormholes on its palms (Galaxy hands).

Third Stage:
At about a third of its health, it will gain increased reach by ripping off its arms and using them as weapons. Blood will now shoot in geysers from its back. It keeps all of its previous move set.

Drops:
-21,000 Blood Echoes
-Ailing Loran Chalice

Tips and Tricks:
-Ludwig's Holy Blade, Church Pick, or the Burial Blade +7 or higher in its transformed state is the best weapon when equipped with Bolt or Fire damage (paper or gem). Any weapon with a bit of reach is good as it can hit several of its arms at once.
-A Flamesprayer or Cannon +5 or higher can be used to deal damage to its head, enough will make it stagger, so that you can visceral attack it. Rush in after an attack, spray its head for a few seconds and retreat or shoot its head with Cannon and wait for it to drop to the ground. Using the Executioner's Gloves or Simon's Bowblade (DLC) is also possible.
-A Call Beyond does a hefty amount of damage.
- You can either stay in front of Amygdala and wait for it to do either version of the Galaxy hands attack. It will drop its head down and use that time to get in a few hits. If your stamina is depleted use the Flamesprayer.
-You can also stay to the side of Amygdala and wait for the attack animations to stop before hitting its arms or rushing underneath it to do overhead damage.
-If a long battle is alright, you can stay to the sides of its feet (be mindful of the curled arm attack as it hits behind) and swipe at its ankles and crotch (will deal about ten damage to the ankles). If you hit its legs enough it will collapse.
-Attacking its arms, hands and head to deal the most damage. Its ankles and tail are the most heavily armored although the crotch is vulnerable.
-To avoid the continuous laser attack continue to dodge to the side. Avoid the shorter laser attack by dodging erratically in all directions or just slowly walk to the sides.
-Molotov Cocktails can help speed the fight along. Make sure to lock onto the head or else they will be thrown towards the crotch.

Glitches:
-In the Chalice Dungeons, Amygdala can become stuck behind the ceiling while performing the leap attack. Link

Damage Indicator:
Slight damage (s)
Moderate Damage (m)
Heavy Damage (h)
Stun (st)

Friday, January 22, 2016

Celestial Emissary

Celestial Emissary:
Information:
The Celestial Emissary is a Great One and Optional Boss in the Upper Cathedral Ward. Gain 2 Insight for killing the boss. Activates the Lumenflower Gardens Lamp upon defeat.

Lore:
The Celestial Emissary is the successful experiment of the Choir to create a go between for the Great Ones and themselves. It was most likely successful because of the refined blood created by Iosefka; the minions in her clinic and in the Lumenflower Gardens were the less successful results of her experimentation.

References and Dialogue:
-It is possible that the Lumenflowers also precipitated the successful transformation while the Lumenwood could not.
-His minions can also be found in the Forbidden Woods.

Description:
Initially a small blue humanoid figure with a bulbous, gelatinous head with light blue, glowing particles floating inside. Although its limbs appear shriveled, it does have a a rather round torso. Later it grows to almost three times its size and will sprout glowing tentacles from where the blue particles were on its head.

Location:
From the Upper Cathedral Ward lamp go up the stairs through the gate (if opened) go up the stairs and down the passage. There will be a Celestial Minion in the passageway. Pass that and you will enter the boss arena.

Combat:
-Weak to Bolt

The Celestial Emissary's arena has three levels: a bottom level with lumenflowers, a second level that is pretty much a landing, and a third level on both sides that has rows of pillars on the side. There are also a bunch of respawning Celestial Minions. They will continue to run towards the hunter and flail their arms around (s) along with a slower swiping attack (s).

First stage:
The Celestial Emissary is disguised as one of the minions and mimics their attack patterns. However it tries to stay towards the back of the pack.

Second Stage:
At around half its health the Celestial Emissary will triple in size and its attacks will do significantly more damage. It keeps the flailing arms attack as well as gaining a body drop attack (h), where it will slam its torso into the ground. It will stomp in quick succession (m), lifting its leg alternately pounding its feet in the ground, and can do a two handed swipe attack (m), raising both its arms diagonally.

Third Stage:
With a third of its health left, the Emissary will sprout tentacles from its head and begin to use a laser attack (h). It will appear as a blue light around his head and shoot a sequence of six lasers in the hunter's direction.


Drops:
-24,640 Blood Echoes
-Communion Caryll Rune

Tips and Tricks:
-A Tonitrus +4 or higher is quite effective although a weapon with Bolt Paper or a Bolt enchantment will fair just as well. 
-A weapon with a long horizontal swipe, like the Hunter's Ax or Ludwig's Holy Blade, can be useful in mowing down the minions.
-Dealing with the minions is fairly easy. Just swipe a few times and that should give you free reign to wail on the Emissary. 
-If you need to heal go to the third level and duck behind the pillars. The boss will not follow you there although the minions will and this should buy the hunter some time.
-Staying close to the boss during the third stage will help keep him from doing the laser attack.

Glitches:
-The Emissary can become trapped if he transforms too close to the back wall. Link
-The Emissary can disappear after transforming. Link


Damage Indicator:
Slight damage (s)
Moderate Damage (m)
Heavy Damage (h)
Stun (st)

Father Gascoigne

Father Gascoigne:


Information:
Father Gascoigne is the second boss located at the end of Central Yharnam. Gain one Insight for finding him, one for witnessing his transformation, and one for killing him. Once killed he activates the Tomb of Oedon lamp.

Special Notes: Acquiring the Tiny Music Box from Father G's daughter, Viola, can greatly help in this fight as it temporarily stuns him although it can also trigger the beast phase of the fight prematurely after using it three times successfully. She is found by going down into the sewers and by reaching the wooden platform with two ladders. Go up the ladder to the right and to the left will be a Brick Troll. Go up the ladder it is guarding (it can follow you up there) and approach the window to talk.
Father G is also a summon available for the Cleric Beast fight, if you have not beaten him in the boss battle. As a summon he will chuckle if you play the music box to him. If brought to his daughter nothing happens.

Lore:
A foreign clergyman, Father Gascoigne, became employed with the Healing Church hunters after moving to Central Yharnam. As he and his partner, Henryk became more and more immersed in the night of the hunt; his family began to notice his sanity begin to slip as he killed more and more. The stench of blood and beasts clung to him and Henryk; soon becoming apparent even to the church itself. As the church dispatched Eileen the Crow to finish off Henryk before the beast in him could completely take over, it was too late for Father Gascoigne. He stayed out on the hunt forgetting to return home to his daughters and forcing his wife, Viola, to brave the trek without the protection of the Tiny Music Box, their reminder to him of his humanity. Viola comes across Father G viciously mutilating the bodies of the huntsmen and approaches him despite his lack of acknowledgement towards her. He, instead, turns his murderous attention to her and kills her, snapping back into sanity only long enough to realize what he had done and to push him over the edge. His daughter frantically begs the hunter to save her father and mother, not realizing that it was too late to save them with the music box. The music only serves as a reminder to him of Viola's futile attempt and drags him deeper into madness. After his death, his partner Henryk arrives to bring him home, also too late, and succumbs to his insanity upon viewing his old partner's body.

References and Dialogue:
-"Beasts all over the shop....You'll be one of them sooner or later. What's that smell? The sweet blood, oh, it sings to me. It's enough to make a man sick. Too proud to show your true face, eh? But a sporting hunt it was." Father Gascoigne
-"Who..are you? I don't know your voice, but I know that smell. Are you a hunter? Then, please, will you look for my mum? Daddy never came back from the hunt, and she went to find him, but now she's gone too.... My m-mum wears a red jewelled brooch....If you find mum give her this music box. It plays one of daddy's favorite songs. And when daddy forgets us we play it for him so he remembers. Mum's so silly, running off without it...Mister hunter...was it really her?Mummy....mummy..." Young Yharnam Girl
-"Hunter attire worn by Father Gascoigne. Similar to the hunter garb created at the workshop, only these are tainted by a pungent beastly stench that eats away at Gascoigne. "Father" is a title used for clerics in a foreign land, and there is no such rank in the Healing Church." Gascoigne's Garb
-"Let there be no doubt...If it moves, you can be sure it's a beast...And even if it doesn't, well, don't take any chances." Earlier Dialogue by Father G that was later taken out. Link

Description:
Father G is a rather tall old man wearing a round brimmed hat, a heavy silver necklace, and a long coat, similar to the Healing Church garb. He has white hair, a beard, very sharp pronounced canines, and is quite obviously blind, as he has bandages over his eyes. He wields a Hunter's Ax and a Hunter's Blunderpistol (behaves like a Blunderbuss, looks like a Pistol).
In his transformed state, he sprouts fur, claws, and grows to twice his size in bulk and height while his clothes hang on him in rags.

Location:
From the Great Bridge lamp, continue onto the bridge until you approach the Huntsman on the right side guarding a staircase. Turn left and continue down the stairs with the dog cages to the right. Go into the building across the bridge. On the right there will be some barrels that can be smashed revealing a passage. Go into the passage and run to the far right side of the room. Drop down there and go through the doorway. There will be a ladder there. Go down the ladder and turn right, eventually reaching a small wooden platform with two ladders. Go down the first ladder and turn right again. Eventually you will see a Maneater Boar down a dark tunnel next to a ladder. Go into the alley past the boar and look for a door way to the right. Go up the ladder inside the room and when you reach the top climb the stairs to the right. A short cutscene will play.

Combat:
-Weak to Fire damage especially in the second half of the fight.

Father G's arena is a large graveyard replete with lots of gravestones to get caught on. There are also lampposts and trees to be aware of as well as a giant statue in the center. To the right is a large staircase with a hole in the fence that drops down on top of a carriage with a body carrying the Red Jeweled Brooch.

First Stage:
Father G's ax is in its one handed form and he will make liberal use of his Blunderpistol. He makes it very difficult to heal up. He uses several melee attacks in this phase including a leap attack (h), dashing forward before jumping; a dragging attack (h), runs or rolls forward with ax dragging across the ground, that he will use in conjunction with a short jump attack (m),  either before or after the dragging attack. He will also do a regular swinging attack (s), where he will swing his ax diagonally twice across his chest.

Second Stage:
After a third of his health is gone, Father G will extend his ax and use the Blunderpistol less frequently. He can still do the swing attack but can also stab (s) instead of swinging a second time. The stab can also be the follow up to him rolling forwards. He will do an R2 attack (h), where he will crouch and pull the ax behind his back before swinging several times in a circle. He can still perform the short jump attack, albeit a lot slower and with heavier damage then before.

Third Stage:
He transforms into his third and final form when there is around a third of his health left. He will turn into a wolf-like creature and become much faster and more erratic. He now has very quick multiple swipes (m) and a leap attack (h), where he will jump into the air and come slamming down. A kick attack (m), where he leans back on one foot before lashing out with a foot, along with a pound attack (h), where he raises his fists above his head as a warning. He also retains the short jump attack.

Drops:
-1,800 Blood Echoes
-Oedon Tomb key

Tips and Tricks:
-He can be parried in all three stages, but avoid trying to parry when he is doing any of his short jump attacks. Parrying leaves him open to quite a few visceral attacks.
-Never dodge back, always dodge to the side.
-Although the gravestones provide some cover, they are also a great place to get stuck in. Going on the staircase solves that problem while buying time to heal and can be very helpful in his third stage. Dropping down on the carriage can also buy time to heal up.
-Be liberal with Blood Vials.
-In his third stage, try to hit him with Molotov Cocktails in quick succession. Two to four typically kill him (with or without the Oil Urn) unless he transformed early because of the Tiny Music Box.
-Use the central statue as cover to heal.
-Stay close to him in his third form to avoid the leap attack.
-The Tiny Music Box can be used to stun him (he will cover his ears and hunch over), but takes a second or so to kick in. Using it three times will also trigger the third stage no matter what amount of health he has.

Glitches:
-Can get stuck between the tree and the carriage if he transforms too close to it. Link
-Can visceral attack him into the wall next to the staircase. Link

Damage Indicator:
Slight damage (s)
Moderate Damage (m)
Heavy Damage (h)
Stun (st)

Sunday, January 10, 2016

The One Reborn

The One Reborn:

Information:
The One Reborn is the only boss in Yahar'gul, the Unseen Village. Gain one Insight for finding it and three for defeating it. Once killed it activates the Advent Plaza Lamp.

Special Notes: You  must kill the One Reborn in order to gain access to the Upper Cathedral Ward.

Lore:
The result of the only successful experiment in Yahar'gul, conducted by the Mensis Scholars.

Description:
A giant rotting amalgamation of body parts with one solitary man on top. It has large "limbs" to the side with smaller ones around the body. It speaks in tongues through out the fight with the occasional shriek.

Location:
From the Yahar'gul Chapel Lamp, head out the door without the Huntsmen on the stairs. Continue down that path past the Chime Maiden and the Brick Troll through the chapel with the three hunters, the same chapel above the Hypogean Gaol. Continue out the door and go down the stairs to the right and continue straight down past the Undead Amalgams. At the base of the hill you will pass an archway and after a few seconds a cutscene will play.

Summons:
-The Old Hunter Defector Antal is available for summoning for this fight. He wields the Church Pick and his summoning bell is located in front of the carriage in front of the fog gate.
-The Old Hunter Yamamura is also available for summoning after killing him in the DLC, having the Impurity Rune equipped, and having left Valtr alive. His bell is located by another carriage near the Nightmare Fog.

Combat:
-Weak to Bolt and Fire
-Strong against Arcane

The One Reborn's arena is another large chapel type building with pillars running along either side of the area. There are two spiral staircases at the far end of the arena where you can ascend to the upper level where Chime Maidens can be found. The Chime Maidens will call down Arcane attacks unless they are killed.

The One Reborn has several attacks varying from Arcane attacks to a very powerful A.O.E.. The physical attacks that it can use are a flailing attack (m), characterized by it moving around erratically; it can use a swipe attack (m), where it raises its larger arm up above its "head"; and occasionally a headbutt attack (m) that it may do when you are on the upper level of the arena. The last attack it does that isn't Arcane involves spewing acid towards the hunter (slight to heavy)

Its Arcane attacks are all signaled by a red light. If the light appears over its head it will form a large ball that becomes a projectile (m) after a few seconds. If the light is over the hunter's head it will dump body parts on the player in quick succession (s). If the area around the One Reborn turns red then it is about to do its A.O.E. attack which causes damage when it screams (h).

Drops:
-36,300 Blood Echoes
-Yellow Backbone (3)

Tips and Tricks:
-Kill the Chime Maidens on the upper level first, be sure to watch out for the projectile attacks and the headbutt. Make sure to attack from the side so that you don't push them off the edge.
-The best weapon is a Tonitrus +5 or higher or any weapon with a Bolt or Fire Gem (cheaper than Fire Paper and Bolt Paper although those are also very effective)
-A very easy way to do this fight is to continuously stagger it by breaking its many limbs. Just walk around breaking each individual leg (4) and then the two ends, leaving the end with the skeleton on top for last.
-Bringing a Flamesprayer +4 or higher can be very helpful, in order to keep getting off damage once it has crumpled.
-Using plunging attacks from above can knock off a large chunk of its health.
-Move up to higher ground when it begins its acid attack as getting caught in it can do serious damage.
-Move back when the A.O.E. begins charging as it can one shot you.
-Stay to its sides, especially where the smaller legs are to attack.
-There are three lock on points, if you are having issues with the projectiles lock on to its head. If not lock on to the part touching the ground.

Damage Indicator:
Slight damage (s)
Moderate Damage (m)
Heavy Damage (h)
Stun (st)


Tuesday, January 5, 2016

Cleric Beast

Cleric Beast:

Information:
The Cleric Beast is an optional Boss located in Central Yharnam, most likely the first one you will meet. Gain one Insight for finding him and three for defeating him. Activates the Great Bridge Lamp upon his death.

Special Notes: Although optional, fighting the Cleric Beast is the only way to obtain the Kirk Hammer.

Lore:
The Cleric Beast was once a member of the Healing Church, who fell to the beastly scourge caused by the old blood.

References and Dialogue:
-"As it was, clerics transformed into the most hideous of beasts." Sword Hunter Badge

Description:
The Cleric Beast is a deformed wolf-like being with antlers and one bigger deformed arm. It is giant, making it slow, and it also walks on its hind legs using its larger arm to drag the rest of its body forwards. Upon arrival, he leaps over the gate at the end of the Great Bridge.

Location:
From the Central Yharnam Lamp, take the stairs to the right. Continue down the road to the right, past the bonfire and the Huntsmen and continue up the stairs. You will see a Brick Troll on your right and some Crows on your left. Head up the stairs to be greeted by more Huntsmen and at the very top of the stairwell some Netherbeasts. Past the Netherbeasts you will see another Brick Troll surrounded by Crows and you will pass under an arch to reach the Cleric Beast.

Summons:
-You can summon Father Gascoigne, if you have not killed him in the next boss battle. He wields a Hunter's Ax and a Hunter's Blunderbuss. His first summoning bell is located past the gate to the left at the Central Yharnam Lamp next to the ax and torch wielding Huntsmen. His second bell is located by the fountain where you encounter the first Brick Troll.
-You can also summon Alfred after encountering him in the Cathedral Ward. He uses a Kirkhammer and Hunter's Blunderbuss. If you have spoken to him he will be at the bell past the gate to the left instead of Father Gascoigne.

Combat:
-Weakness to Fire and Serration
-Strong against Blunt, Arcane, and Bolt

The Cleric Beast's arena is a very long, narrow bridge with several statues in the corners. At the ends, there are two slightly wider sections but it is not by much and they mostly present opportunities to be cornered. The dead ends tend to be a little niche to get caught in so avoid those.

Stage One:
This is not truly a stage but rather a mode that the Cleric Beast cycles through during the fight. In this stage, he is quite slow with very long windups between his swiping attacks (slight damage for left arm, moderate damage for the larger one), he will lift his arm up and swing it across his body; his leap attack (m), he will crouch down before leaping into the air; and his grab attack (h), he will seem to be making a windup for a clap but will grab you instead and pound you into the ground.

Stage Two:
He will howl and glow red after taking a fair bit of damage to his limbs. This is indicative of him healing his limbs and he will enter a rage mode where he is slightly faster and more aggressive. His combos are slightly longer as well.

Drops:
-4,000 Blood Echoes
-Sword Hunter Badge

Tips and Tricks:
-The best weapon for the fight will undoubtedly be the Saw Cleaver or the Saw Spear because of the extra Serration Damage.
-The next best weapon would be the Hunter's Ax as a charged R2 attack will bring the Cleric Beast down for a couple of seconds.
-Stay to the side or behind him. If you have to move towards him, roll towards his smaller arm as that does significantly less damage.
-Hit him with an Oil Urn and then a few Molotovs to help progress the fight along.
-You can visceral attack him if you shoot him enough times although it isn't suggested as he can be taken down pretty quickly with normal attacks.
-He is very slow so don't waste stamina dodging away from him if you can walk backwards to heal up.
-A summon can make the fight more difficult due to the small amount of space in which to fight the Cleric Beast resulting in a lot of collateral damage.

Glitches:
-After the grab attack the Cleric Beast will become passive if you were not killed. 9:35
-After the grab attack the Cleric Beast can throw you off the map. Link

Damage Indicator:
Slight damage (s)
Moderate Damage (m)
Heavy Damage (h)
Stun (st)


Monday, January 4, 2016

Shadows of Yharnam

Shadows of Yharnam:

Information:
The Shadows of Yharnam is the only boss located in the Forbidden Woods. They are the only multi-enemy boss fight in the game. Gain two insight from killing them. Their death activates the Forbidden Grave Lamp.

Description:
The Shadows are a group of three men all outfitted with long black robes. The first wields a Katana like sword, the second wields a scimitar and a candle, and the last a flaming ball in his hand. All three sprout snakes from their head in the second stage of the fight.

Location:
From the Forbidden Woods lamp, turn right and enter the elevator just past Valtr. Go down the shaft and go across the bridge with Snake Parasite (man with snakes for a head) into the house. Once in the house, go straight across the room into another room with an elevator. Go down the elevator and continue down that passage until you reach a pool. Make a left and continue down that trail past the two Man Eater Boars until you reach a fork in the road. Turn left and you will enter the boss arena.

Summons:
-You can summon the Old Hunter Henryk if you killed him as per Eileen the Crow's instructions, who wields a Saw Cleaver and a Hunter's Pistol. You can reach his summoning bell by approaching the boss arena only instead of going left at the final fork turn right.
-You can also summon the Younger Madaras Twin after equipping the Impurity Rune given by Valtr, who wields a Hunter's Ax with the occasional use of Fire Paper and a Hunter's Blunderbuss. His summoning bell is located to the right of the fork past Henryk's bell.

Combat:
-Weak against Bolt
-Strong against Arcane

The arena for the Shadow fight is a large graveyard with a massive pillar in the middle. There are also large pools of water and the walls surrounding the arena are noticeably pitted allowing the Shadow to pin the hunter in several places.

Stage one:
To make this easier the Shadow will be referred to by their weapons. The Katana Shadow will aggressively rush you in this stage performing several slashes (m) and a leap attack (h). The Candle Shadow will try to catch you in the arc of the flame (h) while following closely behind the Katana Shadow. If you get too close to the Candle Shadow he will swing at you with his scimitar (m). The last shadow, the Pyromancy Shadow will stay to the back and release three fireballs (s) that will track your movement slightly.

Stage two:
This occurs when one of the Shadows is below about 60 to 70% of his health or the fight continues for a fair chunk of time. They will all stop and sprout snakes from their heads before continuing their assault. At this point, they will all gain increased range for their attacks. The Candle Shadow can now use a variant of the Augur of Ebrietas as well as a flaming scimitar (m); the Katana Shadow can now move much quicker and his sword is a bit longer(m); and the Pyromancy Shadow's fireballs now track much better (s).

Stage three:
This occurs when two Shadows are dead. The last Shadow gains the ability to summon giant snakes, indicative by it bending over and a red circle appearing on the ground. The snakes come out of the ground and have infinite reach as well as being able to one shot you (h).

Drops:
-20,460 Blood Echoes
-Blood Rapture Rune

Tips and Tricks:
-The best weapon to use is a Tonitrus +5 or higher as it is cheaper than constantly using more and more Bolt Paper.
-If not the Tonitrus, any weapon that isn't Arcane and is +5 of higher equipped with Bolt Paper should do fairly well.
- A Hunter's Blunderbuss is useful to parry so you can use visceral attacks to take out a large chunk of their health (mainly Katana Shadow).
- Try to take off chunks of their HP in equal portions to prolong the first stage as much as possible.
-You can isolate them by moving around the pillar in the middle of the arena in order to get off a few hits or to visceral attack them without getting attacked by the others.
-Kill the Katana Shadow and Candle Shadow first because the Pyromancy Shadow is the least deadly at close range.
-Whichever Shadow is the last one, kill them ASAP.
-A summon is helpful as long as you are mindful of how much damage they are doing to the Shadow of their choice or else they may start stage two much sooner than hoped for.

Glitches:
-You can render the Shadows passive by entering the arena around the Nightmare Fog and then exiting and re-entering the game. Link
- You can render them passive in co-op by keeping the host near the Nightmare Fog and allowing the other player to attack. Link

Damage Indicator:
Slight damage (s)
Moderate Damage (m)
Heavy Damage (h)
Stun (st)


Darkbeast Paarl

Darkbeast Paarl:


Information:
Darkbeast Paarl is an optional boss located in between Old Yharnam and the Hypogean Gaol. Gain one Insight for finding him and three for killing him. After she is killed the Graveyard of the Darkbeast Lamp is activated.

Special Notes: If you haven't attacked any of the beasts directly in front of Djura's tower, Djura will be friendly after going into Paarl's Arena and going up his tower from the back route. 

Lore:
Darkbeast Paarl is one of a group of beasts originating in Loran. She was transformed much earlier than the beasts in Yharnam; most likely an unfortunate Pthumerian. Her kind was closely studied by Archibald, the creator of the Tonitrus and a member of the Healing Church. She most likely is above ground to be studied by Archibald to avoid the dangerous trek into the dungeons.

References and Dialogue:
-"A unique trick weapon contrived by Archibald, the infamous eccentric of the Healing Church workshop. Striking this peculiar iron morning star flail like a match generates the same blue sparks that blanket a darkbeast." Tonitrus
-Another is found in the Chalice Dungeons as a boss, Loran Darkbeast.
-Paarl is Dutch for Pearl, suggesting a term of endearment or a female.

Description:
Paarl is a skeletal beast covered in black fur that becomes infused with electricity. She is quite large and moves very quickly around the graveyard. When she strikes the ground electricity shoots from the tips of her claws.

Location:
From the Hypogean Gaol Lamp, go down the stairs two levels until you see a small doorway. enter through the doorway and continue to the last cell of the prison. There will be a hole in the wall, enter through there and down some stairs will be a pile of dark fur and bones which will become electrified as you approach it.

Combat: 
-Weak to Fire and Arcane
-Strong against Blunt and Bolt

Paarl's arena is a walled grassy knoll with no real areas to take cover. There are a few niches to avoid along the walls but other than that there are no real places to get stuck in.

First Stage:
Paarl will swipe with her claws usually in groups of two and three (m), quick windup with right or left arm; perform a leap attack (h), crouches before leaping towards you; will slam her fist down causing sparks to fly (h), makes a fist in the air as a windup; and lastly will do an A.O.E. blast (h), she will rock back on her back legs and scream.

Second Stage:
About a minute into the fight she will perform what looks like the A.O.E. but is actually her charging up. She will now shoot electric trails from his claws and is much more aggressive.

Drops:
-23,100 Blood Echoes
-Spark Hunter Badge

Tips and Tricks:
- Do not use a Kirk Hammer in its transformed state
- Ludwig's Holy Blade or a Saw Cleaver +4 or more with Fire Paper or a Fire Blood Gem, are the best because of the faster windup times.
-A transformed Hunter's Axe +4 with the additional items, can be very helpful if you are able to perform a charged R2 attack as it will knock Paarl over and she will lose his aura
-Do not lock on to Paarl, try to stay under her, and aim for her back legs. Enough hits will drop her to the ground without her electric aura and she will have to run away to charge herself back up.
-Roll through her swipes to get underneath her and even if you take damage it will give you a couple of seconds to heal up or attack to gain back the health
-Keep Paarl away from the wall so you do not get trapped
-Flamesprayer +4 is incredibly useful as when Paarl is knocked down you can continue to do damage while waiting for your stamina bar to become full. The constant damage will keep her from getting up.
-Bring Molotov Cocktails and an Oil Urn if you want to shave off a good portion of her health during the fight.
-Henryk's Hunter Set is a good edition to the fight because of its high Bolt resistance

Glitches:
-You can trap Darkbeast Paarl in one of the niches along the wall. Link
-You can render Darkbeast Paarl passive by exiting the game in her arena and re-entering. Link

Damage Indicator:
Slight damage (s)
Moderate Damage (m)
Heavy Damage (h)
Stun (st)

Blood Starved Beast

Blood Starved Beast


Information:
The Blood Starved Beast is an optional boss located in Old Yharnam. There is another one, already dead, located inside the large chapel which is crucified before a crowd of Beast Patients and Cloaked Beasts. Gain one Insight for finding it and three after its death. Once killed it activates the Church of the Good Chalice Lamp.

Special Notes: Killing the Blood Starved Beast unlocks the door to the Healing Church Workshop. Down the stairs from the Cathedral Ward Lamp and to the right will be a door that will now be unlocked.

Lore:
The Blood Starved Beast is one of the many who fell to the beastly scourge that destroyed Old Yharnam. Before its transformation, the Beast's addiction made it the object of purifying rituals, such as self flagellation, most likely initiated by the Healing Church.

References and Dialogue:
-Can be found be found crucified in front of the altar in Old Yharnam.
-Can be found in the Chalice Dungeons
.
Description:
The Blood Starved Beast looks like a crouched over animal with the skin on its back flayed open to expose its bones. It has long claws and is mostly known for its erratic movements. It has almost no hair and when it rears up it exposes a prominent set of ribs indicative of its starvation. When cut it bleeds clear fluid and while running the skin on its back flaps around.

Location:
From the Old Yharnam lamp, make your way outside and across the bridge: from there continue down the stairs at your right. There will be another set of stairs to the right go down those and you will go around a corner to see a ladder. Go down the ladder and run straight until you see the tiny building on the right. Go down that ladder and take a right. Enter the small doorway and continue through the room. You will exit into a courtyard with some Scourge Beasts (werewolves), kill them, turn left and continue down that road. You will go down a set of stairs and will go down a steep slope into a church.

Summons:
There is one summon available for this fight if you spoke to him in the Cathedral Ward: Alfred Vileblood Hunter, who wields a Kirkhammer and a Hunter Blunderbuss. His summoning bell is located behind the wall to the right of the stairs leading down to the church.

Combat:
-Serious Weakness to Fire
-Strong against Arcane and Bolt

The Blood Starved Beast is located in an abandoned church. The church is very long with a row of pillars on either side of the arena and a large altar positioned at the back of the church. Behind the altar is a body with three antidotes.

First stage:
The Beast attacks with a set of forward slashes (m), raises its left arm and rears back a bit, a single claw swipe sometimes followed by a charge attack (s), raises right arm slowly, and will jump towards the player before slashing (m), raises right arm and lunges towards player, in the first stage. It approaches quite slowly in this stage and the windup for its attacks are pretty slow at this point although the actual slash is executed quite quickly,

Second stage:
The Beast enters the second stage when it rears up on its back legs and howls while clear fluid shoots from its body. It is now faster and more erratic and its attacks have a poison effect to them. Its combos are much longer at this point and it is more likely to use its grab attack (h), moves both arms out to the side at hunter level (like it is about to clap), and its A.O.E. attack (h), it moves back and forth with its head down before standing up releasing a poison cloud.

Third stage:
Also shown by the Beast rearing up on its hind legs and howling. It now has a poison "aura" of sorts and even being too close to it will result in a poison effect taking hold. It again gains more speed and it more likely to use the poison cloud attack.

Drops:
-6,600 Blood Echoes
-Pthumeru Chalice

Tips and Tricks:
-Using Alfred is very helpful in this fight because he becomes a great decoy for the Beast. Be careful to watch his health and distract it when he needs to heal.
-Hiding behind pillars will give you time to heal up or use an antidote. Stay close to them if you can and duck behind when you are low on health.
-Always dodge to the left, never backwards.
-The best weapon for this fight would be any weapon with serration damage, such as a Saw Cleaver or a Saw Spear +3 or higher equipped with Fire Paper.
-The Beast can be staggered at all stages of the fight with Blunderbuss or a charged R2 attack from behind.
-A Hunter Blunderbuss is the best secondary weapon if you are trying to visceral attack it, in which case wait until it raises its right arm for the claw swipe or the grab attack when you are out of range. These are the easiest attacks to parry but the others are possible.
- A Flamesprayer +3 or higher can be used as well in conjunction with Alfred or just as a means to preserve stamina in order to dodge away once it turns around. Keep a continuous spray towards its back or sides to avoid getting hit.
-Walk forward and to the left and his attacks will miss.
-Bring lots of antidotes and make use of the ones on the body behind the altar if you run out
-Wearing the Black Church Garb is helpful due to its high Slow Poison Resistance
-Molotov Cocktails are great to use at the end of the fight although be prepared to miss.
-Pungent Blood Cocktails can distract the Beast although it still attacks the item erratically. Use this time to heal up or pop a few antidotes. If not, attack while it is distracted.

Glitches:
-Can lunge through brick wall behind altar and get stuck there. Watch 3:50
-Can be visceral attacked through the wall. Link

Damage Indicator:
Slight damage (s)
Moderate Damage (m)
Heavy Damage (h)
Stun (st)